Back in April of last year, I had the opportunity to show how our new CFS Designer software could help structural engineers “go lean” in their design process by eliminating repetitive tasks (while still meeting required design standards, of course!). Since then, I’ve had the opportunity to visit with hundreds of engineers in person to teach them about CFS Designer and how it can help them improve and optimize their workflows. As a power user of the software, I want to share my top tips for letting CFS Designer help you save the maximum amount of time.
Tip #1. You need to create only one design file for each project.
CFS Designer has to generate lots of code-compliant designs quickly, but that doesn’t mean you need to end up with dozens of unrecognizable file names on your desktop. The software includes a very handy WorkSpace area in the lower left-hand area of the screen that enables you to save all your wall, jamb, header, and general interaction designs in a single project space. This means that you will be saving only ONE file for each project, a feature that can save you a lot of confusion over time.

Tip #2. Quickly duplicate similar wall sections or design types by right-clicking on the model name in the WorkSpace.
On cold-formed steel projects, there are often very similar wall sections or jambs that you’ll need to design. They may have slightly different parapet heights, different loading or different wall widths. Instead of starting from scratch and creating a new section every time, CFS Designer allows you to right-click on any existing design. The right-click action brings up a “Duplicate” pop-up which lets you create an identical model in your WorkSpace. You then have the ability to change the model name, make slight modifications, and then re-save your project to see it show up as a new model in the WorkSpace area.

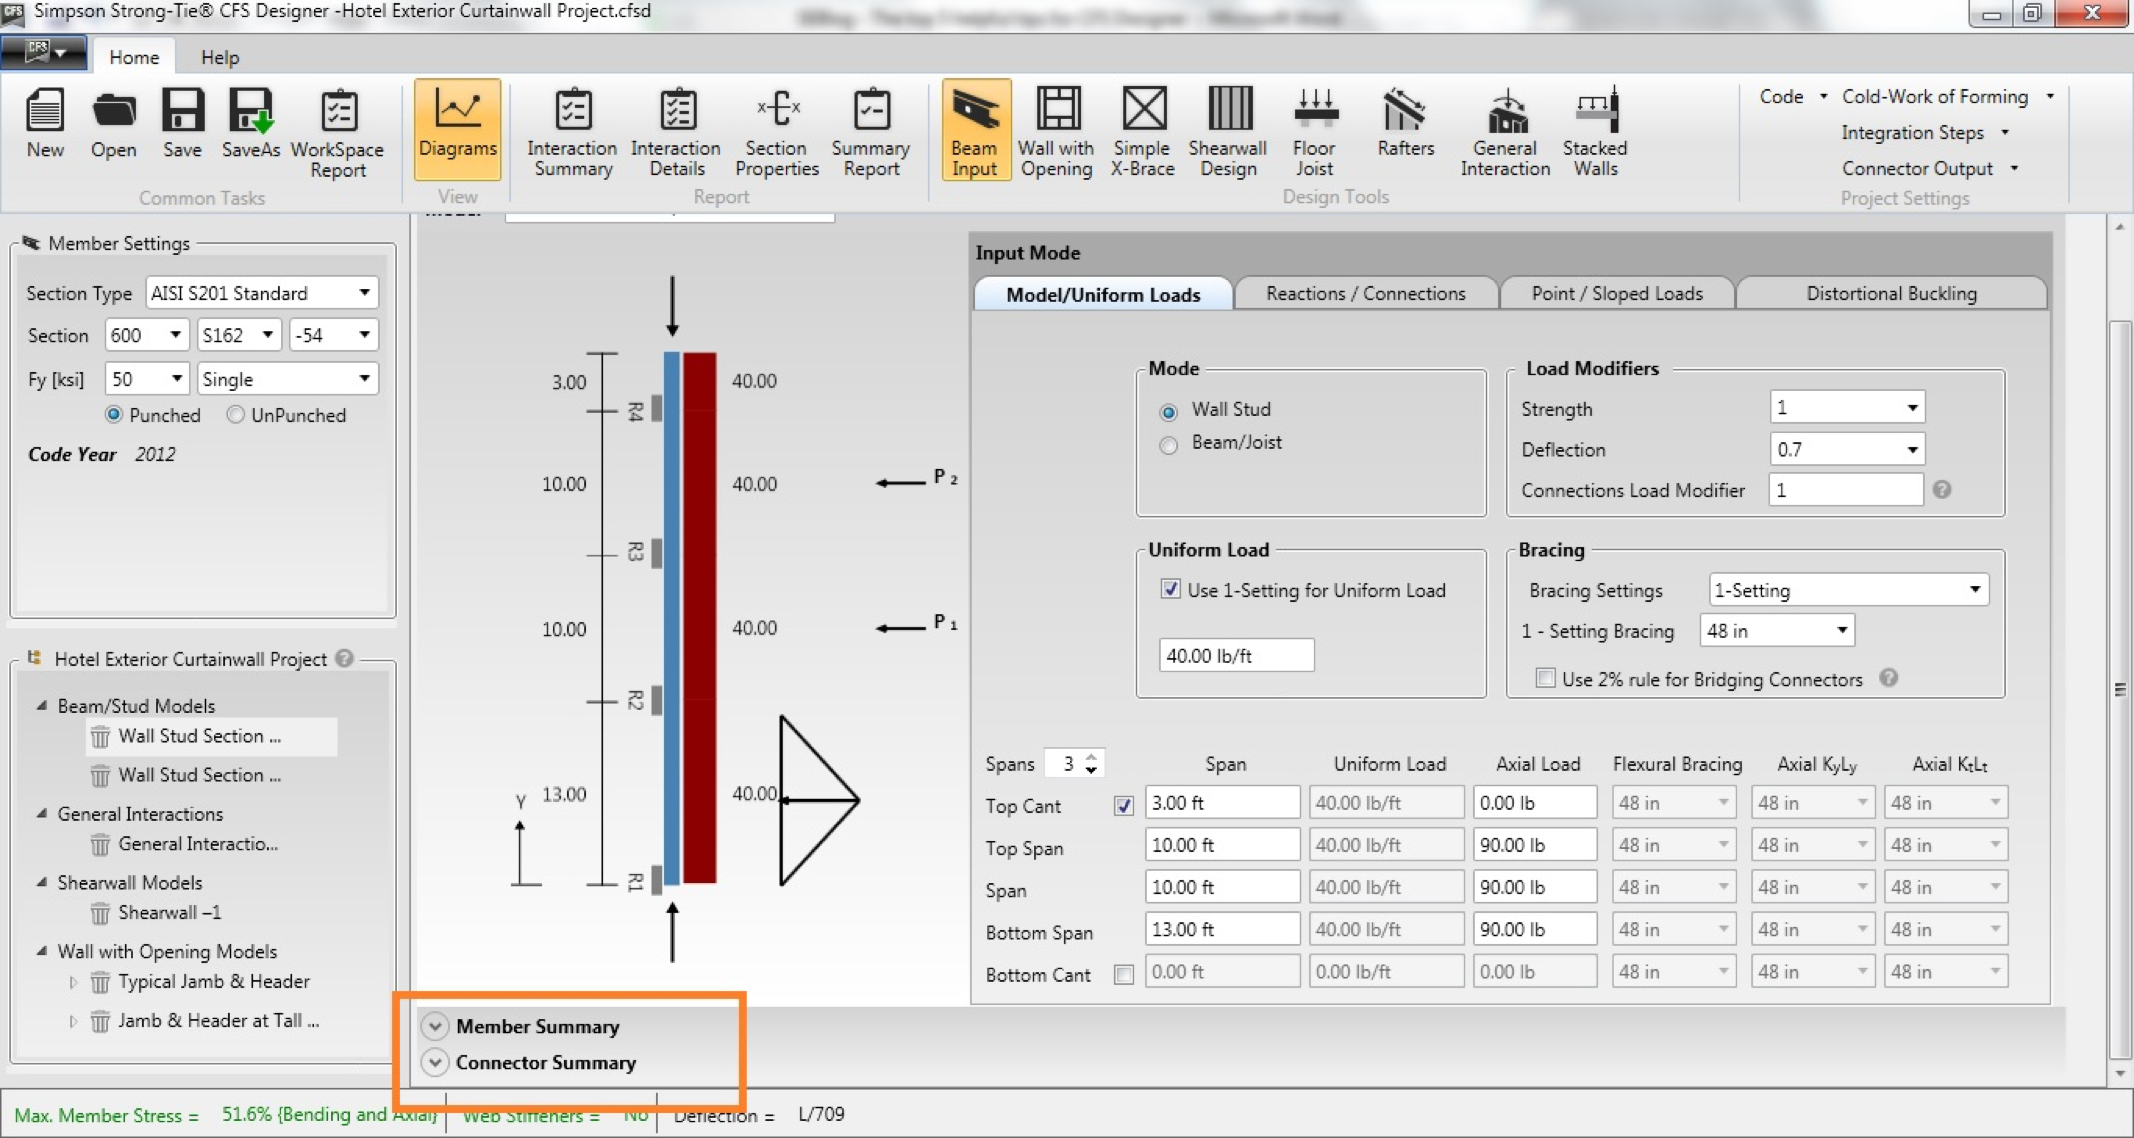
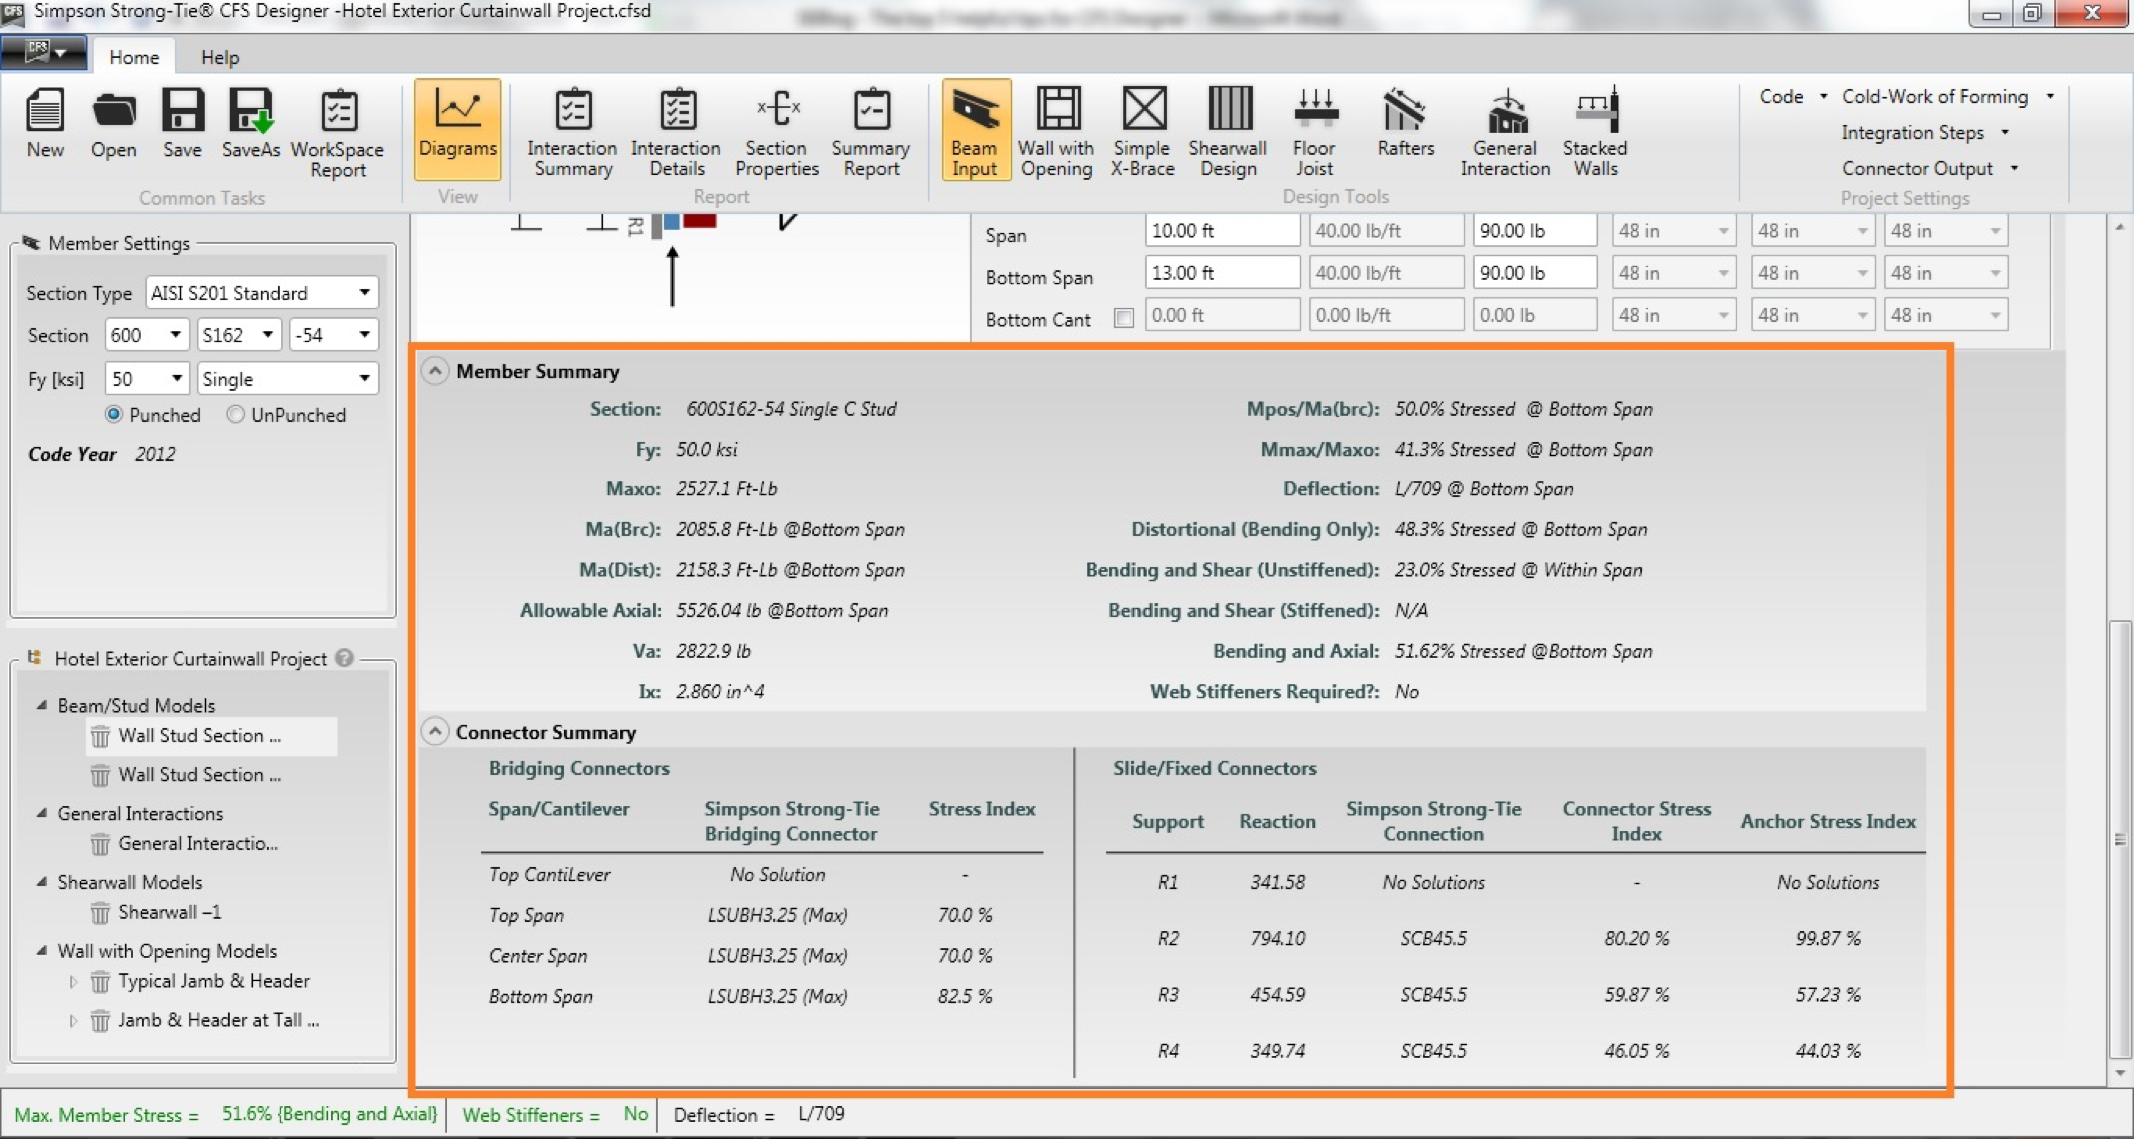
Tip #3. Expand the “Member Forces” and “Connection Summary” sub-menus in the Beam Design module to get real-time updates of the reaction loads, member stresses and connection solutions.
A critical area of member design is the reaction points, because it doesn’t really matter whether your cold-formed steel member is adequately designed if the connection points don’t have a solution. Many engineers I met with thought they had to click on the “Summary Report” button every time they wanted to know the reaction forces, waiting anywhere from 10 to 15 seconds for the PDF file to load and then having to scroll through to find the correct section. Thankfully, there’s a much quicker way to view the reactions. CFS Designer instantly updates the reaction values on the design screen, but the onscreen menus that have this useful information need to be opened up first. Within the Beam Design module, click on the small down arrows to the left of “Member Forces” and “Connection Summary,” and that will expand these two useful sections and display the design information without your having to wait and generate the output. On a related note, another useful area to keep an eye on during design is the very bottom of the screen, where green text will let you know when your maximum member stress and web crippling check are compliant, red text will alert you if your member design is insufficient, and the deflection ratio limit is always displayed.
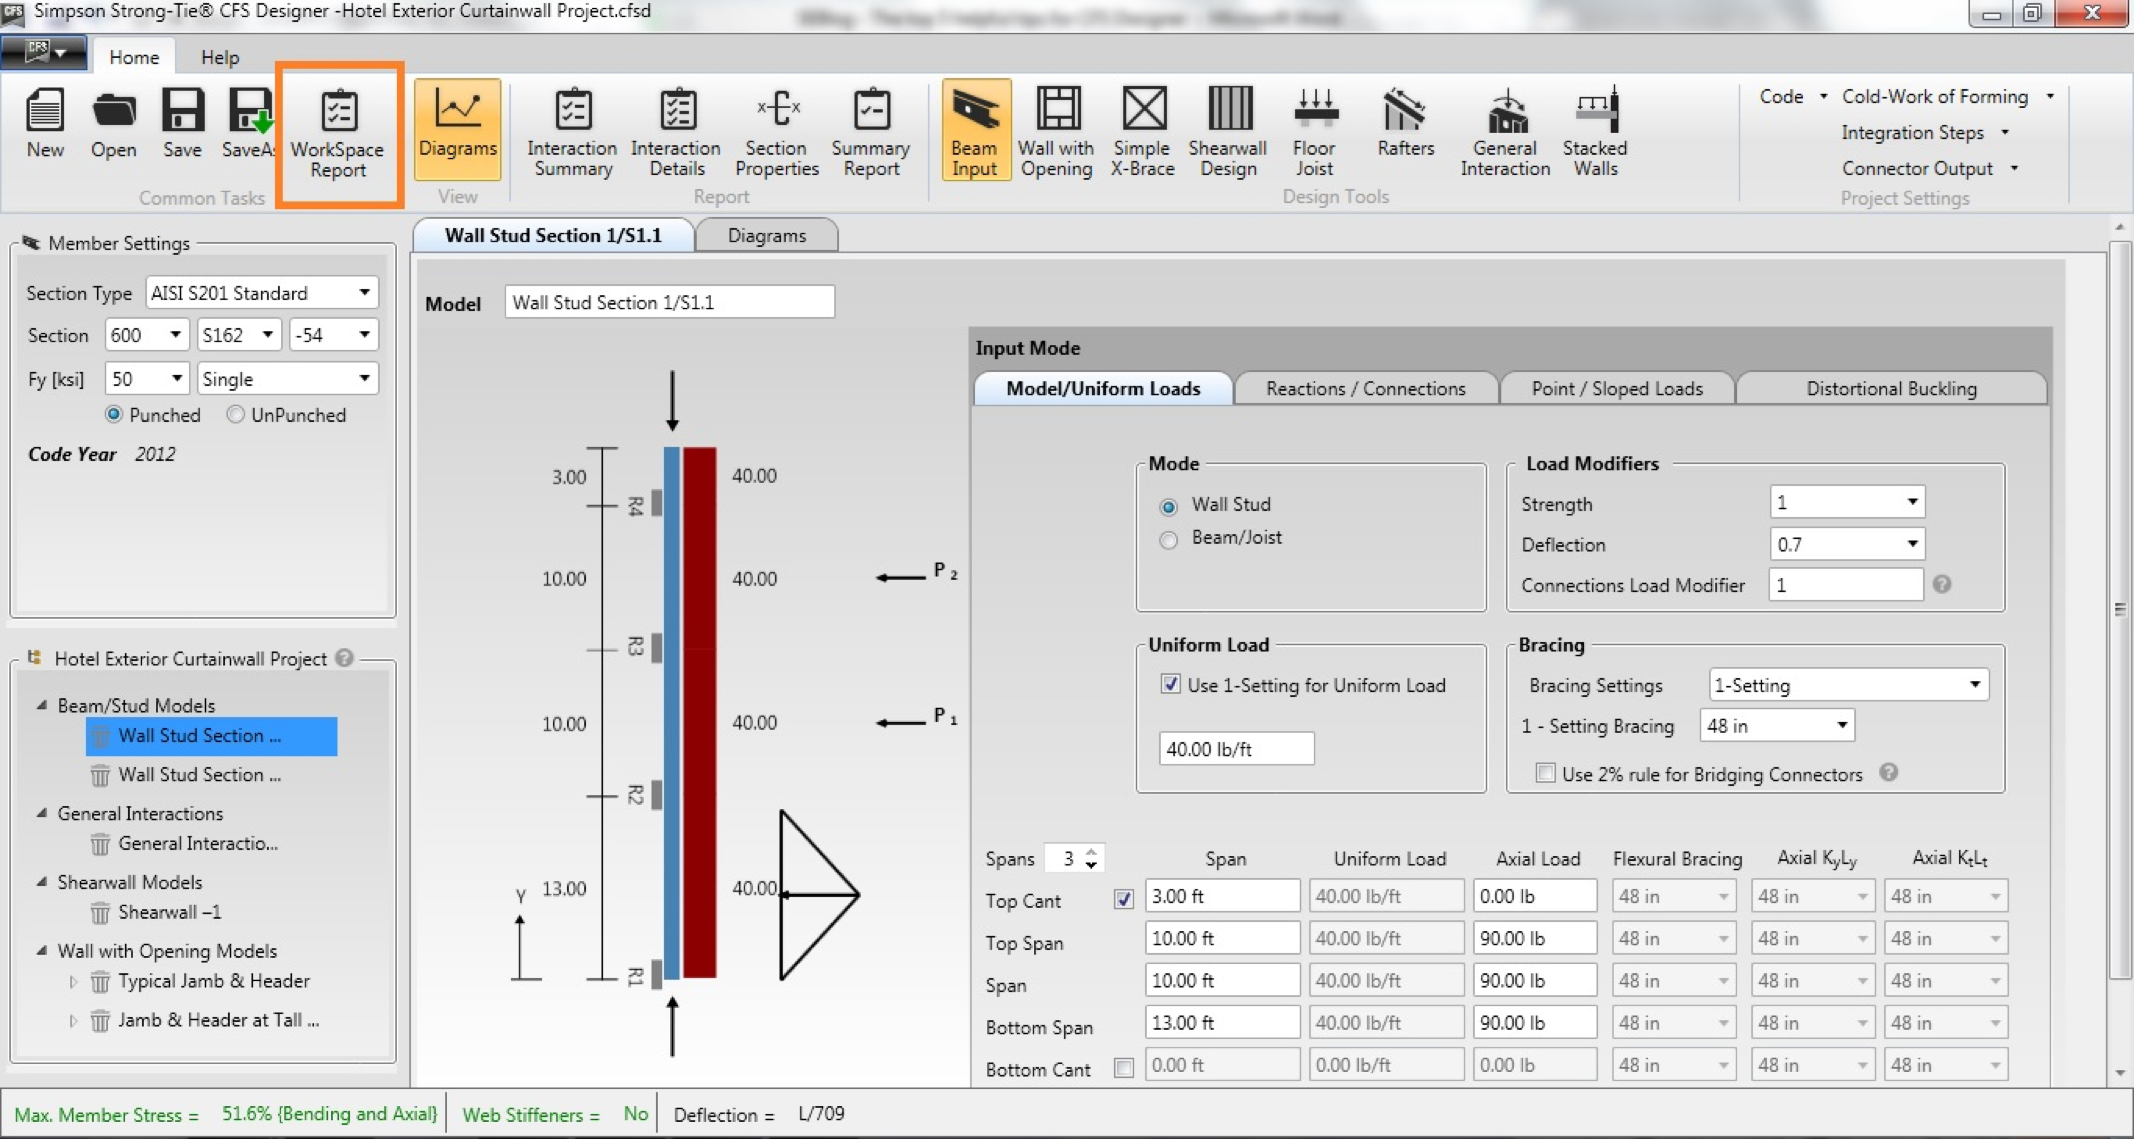
Tip #4. Use the “WorkSpace Report” button for a one-click method of combining ALL the individual summary pages into a single PDF file.
After you’re done generating all your different models and saving them to your WorkSpace, you’re probably going to want to generate the output files you can print and add to your calculation package for submittal. One engineer I met with a couple of years ago told me that this was the most dreaded step because it meant she had to open each model, click on the “Summary Report” button, wait those 10–15 seconds for the PDF file to generate, and then print it out or save it. For large projects, this would need to occur 20–30 times – yikes! Thankfully, a huge part of the development of CFS Designer relies on feedback such as this to help Simpson Strong-Tie continuously improve the program’s functionality. The latest version of CFS Designer introduces a “WorkSpace Report” button, which takes a single click to create all of the summary reports for each model type, saved in a single PDF file.
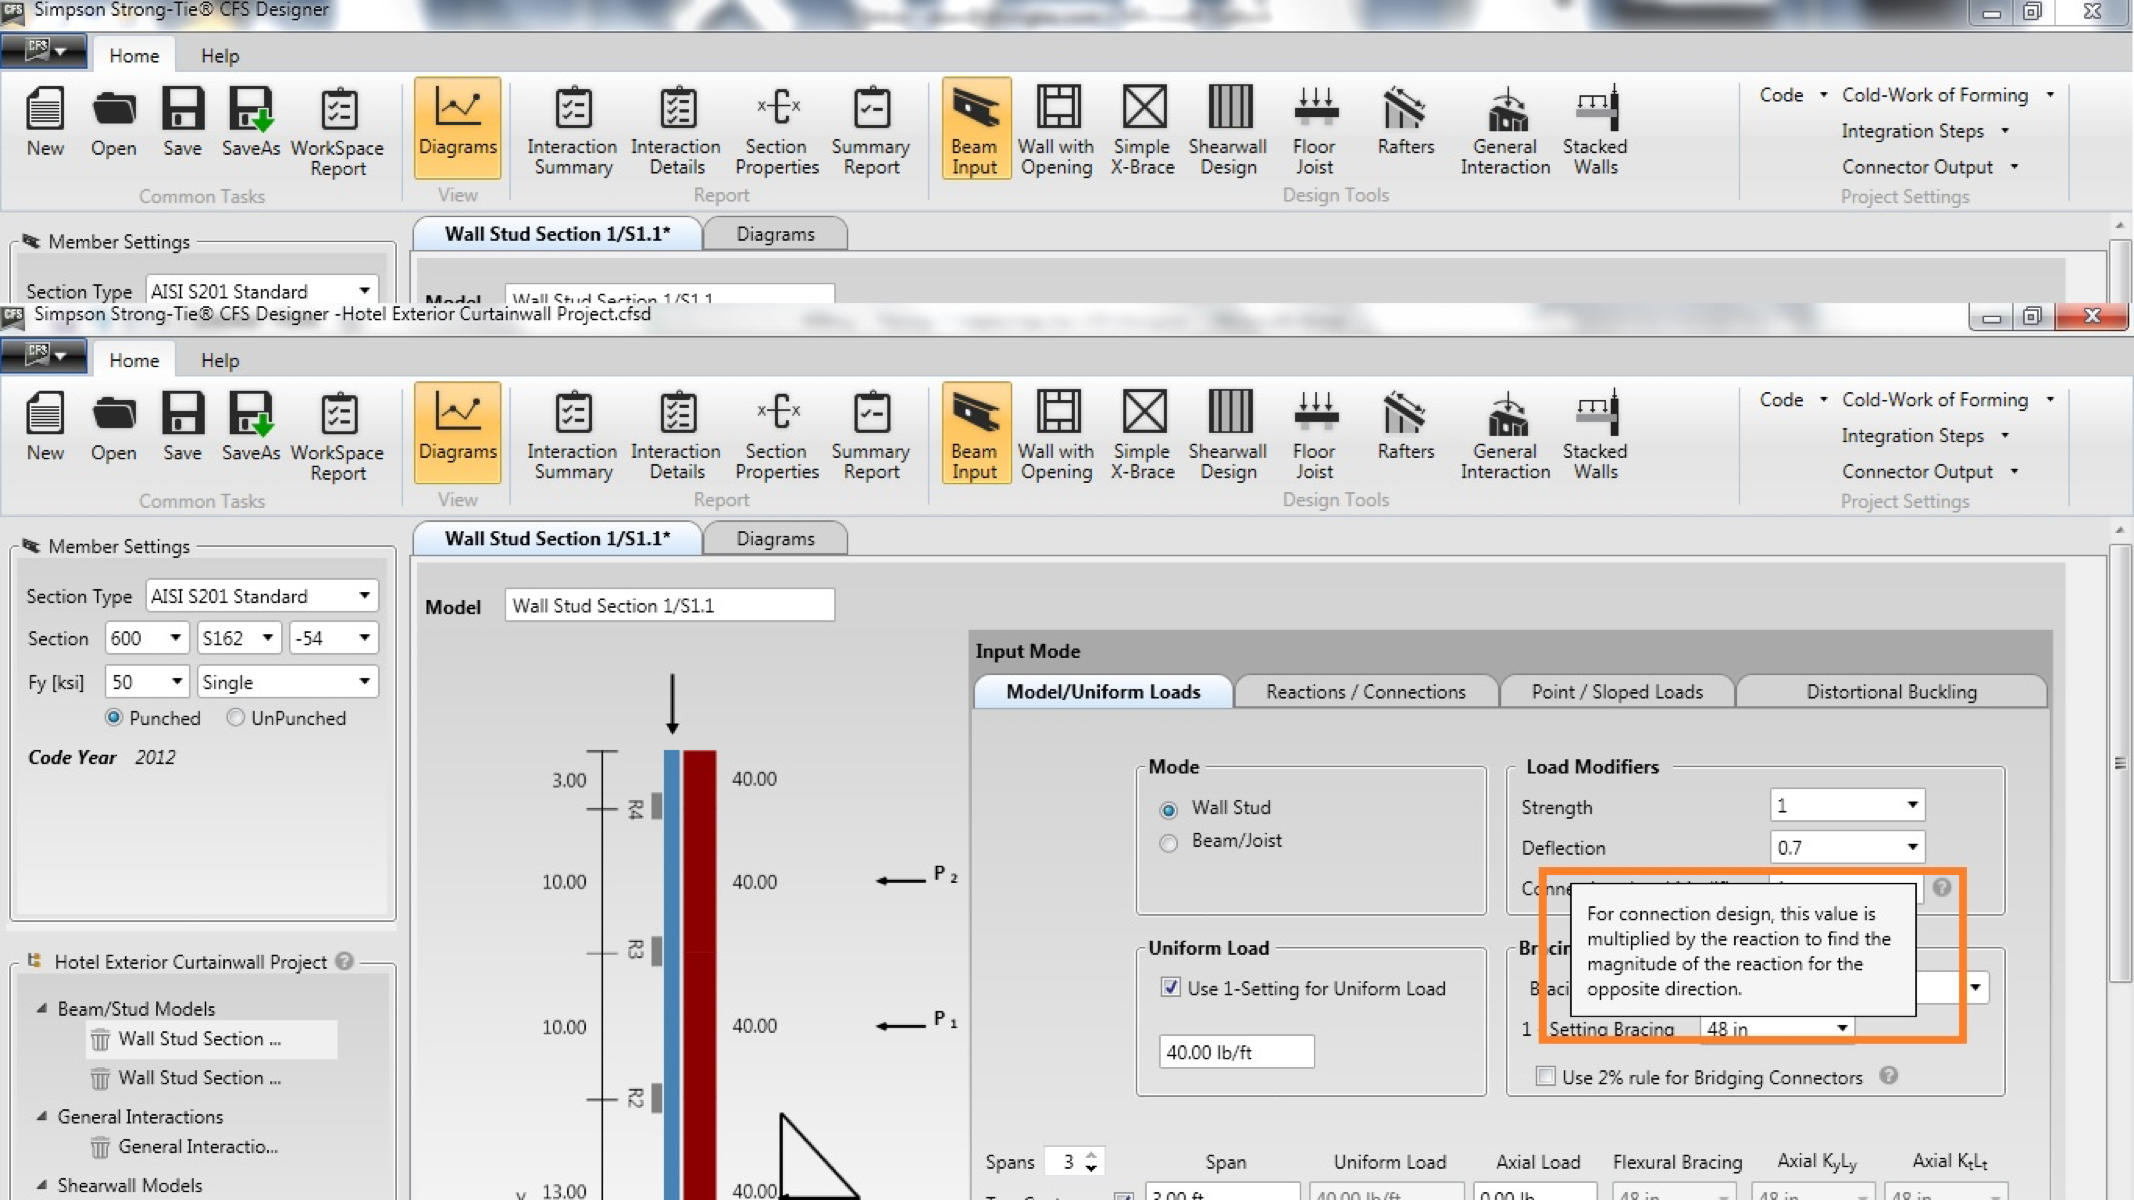
Tip #5. Use the onscreen tip pop-ups. Small gray question mark icons are strategically placed throughout CFS Designer to offer helpful tips and tricks for specific input boxes.
Structural engineers are expected to know a lot, but it isn’t always necessary to remember all the details if you know where to look them up. Because the information requested by some of the input boxes may not be completely self-evident, we built in some handy pop-up tips to help out. A small gray circle with a question mark inside makes its appearance next to input boxes. Hovering your mouse over one of these question marks will cause an info box to appear, letting you know what information is required, what code section to reference, or what design methodology is being used. I have found these pop-up tips to be immensely helpful, especially in conjunction with the program’s User’s Manual (located under the Help menu, at the top of the program).
I’ve had fun sharing some of my top tips with everyone today, but there is a great opportunity coming up to learn even more about our CFS Designer software from one of the original developers of the software. Join me and Rob Madsen, P.E., Senior Project Engineer from Devco Engineering, for a one-hour live demo of the software and connection solutions. Rob has been described as one of the premier structural engineers in the cold-formed steel design arena, and he will walk you through detailed wall stud, jamb, header and stacked wall design examples using CFS Designer. I’ll be presenting on the innovative, tested and code-listed product solutions that Designers can use to save time in addressing the critical connection points in CFS design. We hope you can join us for the live demo, but if you have other commitments at that time, a recording of the webinar will be made available on our website for your viewing convenience. The course will also earn professional development hours (PDHs) and continuing education units (CEUs) for any folks who need credits to renew their professional licenses.
Bonus Tip: Sign up for our upcoming CFS Designer™ webinar on Thursday, September 28!
Further Reading
For additional information or articles of interest, check out these available resources:
- AISIStandards – A free download of all the cold-formed steel framing standards adopted by the 2015 International Building Code.
- CFSEI – The Cold-Formed Steel Engineering Institute, an incredibly useful technical and professional resource for Designers of cold-formed steel structures, with a huge library of technical notes.
- Get There Quicker! How CFS Designer Can Help Speed Up Your Design Process – An SE Blog introduction to CFS Designer software.
- Decrypting Cold-Formed Steel Connection Design – A Structure magazine article on the mysteries of CFS connection design, by Randy Daudet, S.E.
- Cold-Formed Steel Curtain Wall Systems – An SE Blog post on exterior curtain wall systems.