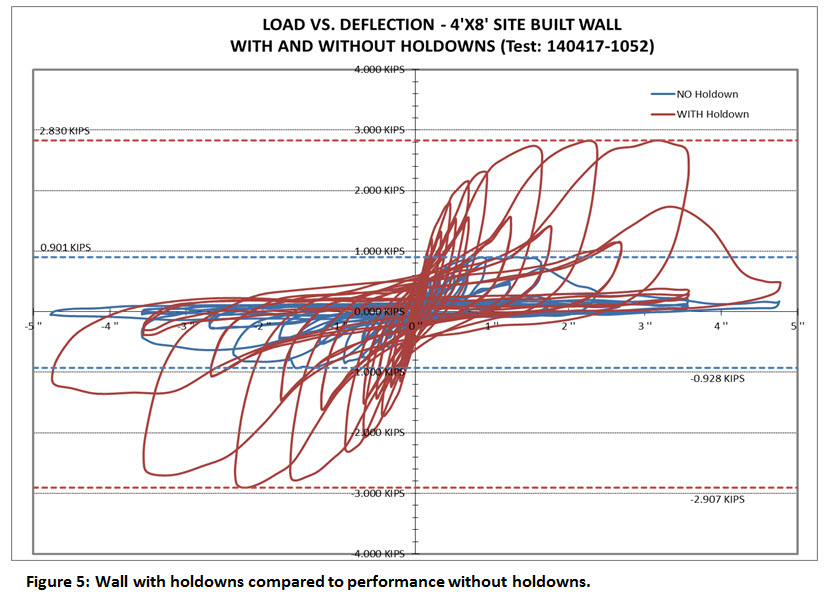
Figure 5: Wall with holdowns compared to performance without holdowns

Figure 5: Wall with holdowns compared to performance without holdowns


Figure 5: Wall with holdowns compared to performance without holdowns
Figure 5: Wall with holdowns compared to performance without holdowns