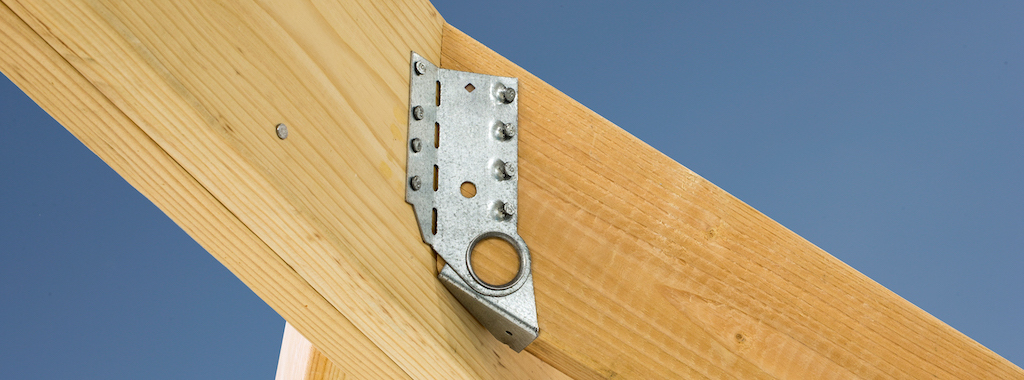
It would be a lot simpler for designing engineers if structural connections were always for members at right angles to one another. Often, connections have to be designed for supported members that are at a skewed or sloped angle rather than perpendicular to the header. In these cases, the engineer will have to choose between a premanufactured adjustable hanger and a custom hanger. Simpson Strong-Tie offers both options, and in the following post, Randy Shackelford, P.E., discusses the various considerations that may affect a specifier’s choice.
It makes things easy for an engineer when the building being designed is rectangular. This allows you to make the connections between nice perpendicular members, and standard connectors and joist hangers are easy to specify.
But buildings are not always rectangular and connections are not always between perpendicular members. Non-perpendicular members can have a skewed connection, where the supported member is moved side to side from perpendicular; or a sloped connection, where the supported member slopes up or down from a standard horizontal orientation; or a combination of the two.
To help with these situations, Simpson Strong-Tie offers the option of either premanufactured adjustable hangers or custom-manufactured hangers. The choice may depend on the time frame in which the hanger is needed, the load demands that will be placed on the hanger, the cost of the hanger, or all of these.
If the demand load is low or an immediate solution is needed, Simpson Strong-Tie offers several adjustable hangers that can be skewed, sloped, or both in the field. Adjustable hangers are likely to be the most cost-effective option if they meet the load requirements of the connection.
Simpson Strong-Tie has recently revamped its offerings of adjustable joist hangers. The older versions of adjustable hangers, known as the LSU and LSSU series, required that the hanger be attached to the carrying member before installation of the carried joist. This required a disruption of the normal installation sequence in the field. Two new models of adjustable joist hangers have been developed that can be installed after the joist is placed on the supporting member.
For lighter loads, as in a rafter-to-hip connection, the newly developed LSSJ is an economical option. It installs on only one side so all the fastener holes are easily accessible. Because it doesn’t have a flange that extends behind the rafter or joist, it can be installed as a retrofit. It accommodates roof pitches from 0:12 to 12:12. The swivel seat provides the code-required bearing for the rafter/joist. Finally, note that the hanger comes in two models, LSSJR for skewed right, and LSSJL for skewed left.
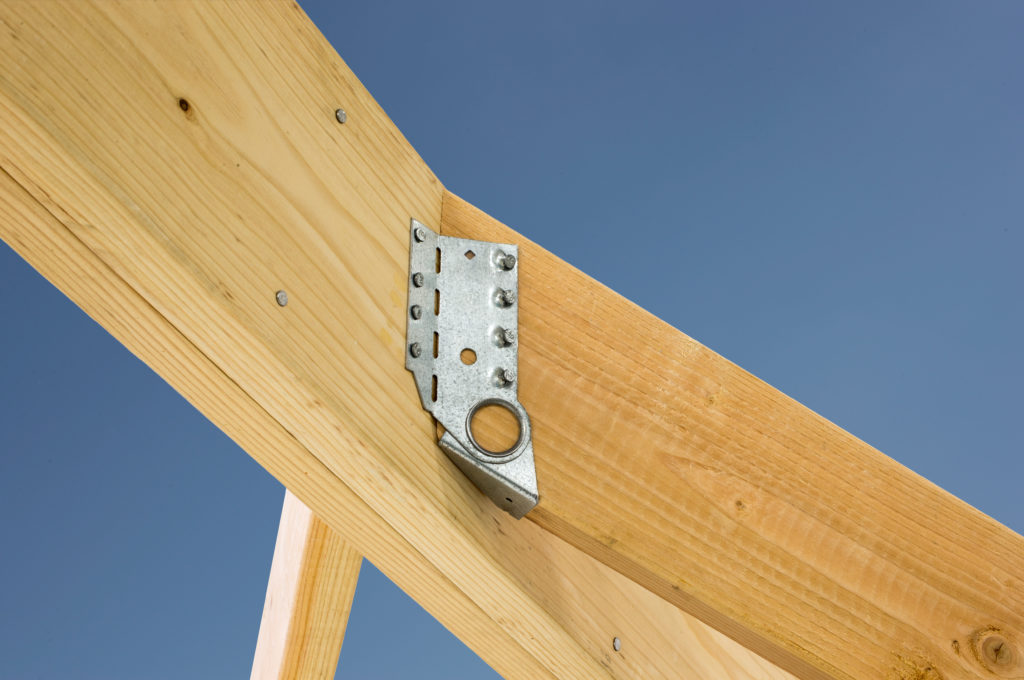
For heavier loads, a new double-sided adjustable hanger has been developed, the LSSR slopeable/skewable rafter hanger. This new design allows the hanger to be installed after the sloped joist or rafter is already in place. The bendable side flange design allows for easy skew adjustment for angles of 0° to 45° from perpendicular. In addition, the swivel seat provides bearing for the joist or rafter and allows adjustment from horizontal to 45° downward.
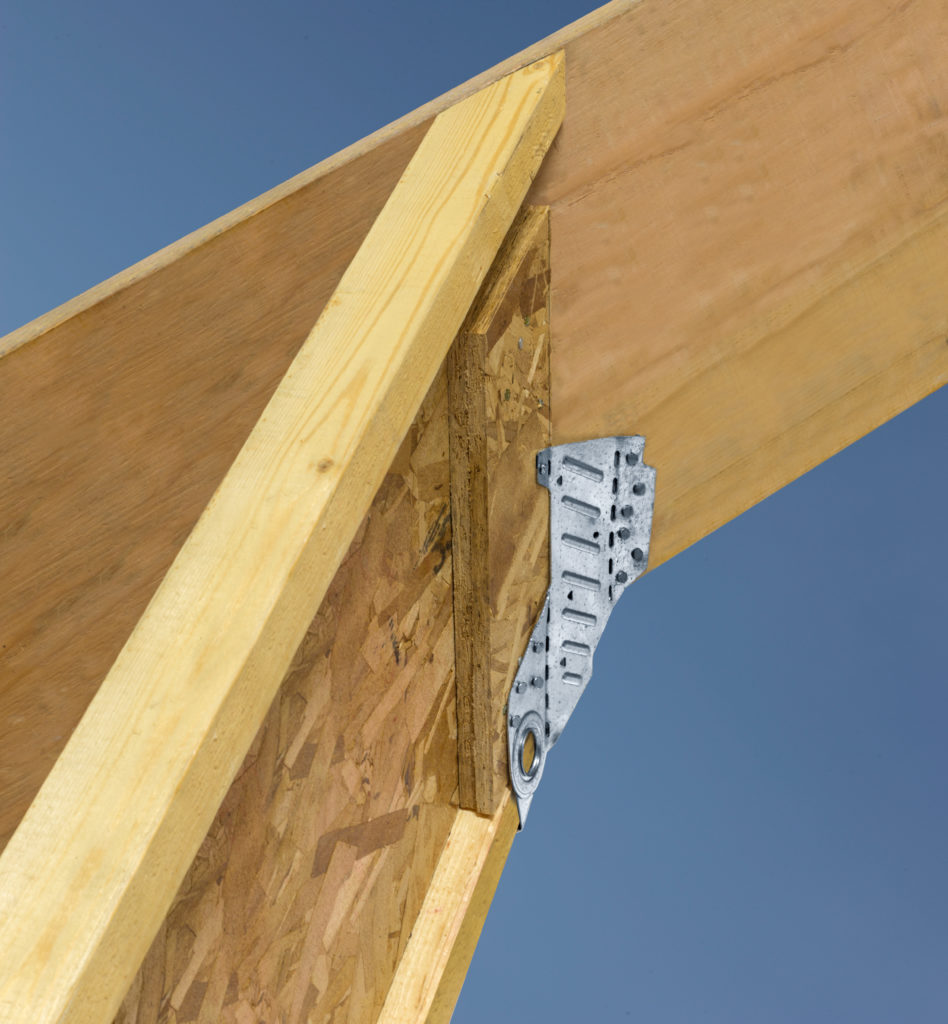
Other hanger series are adjustable only for skew or slope, but not for both. For example, the THASR/L series is designed to accommodate connections skewed from 22½° to 75°. Conversely, the new LRU ridge hanger is designed to support rafters at ridge beams with roof slopes of 0:12 to 14:12. Finally, the SUR/SUL/HSUR/HSUL series is not adjustable, but is manufactured with a skew of 45° either right or left in several sizes.
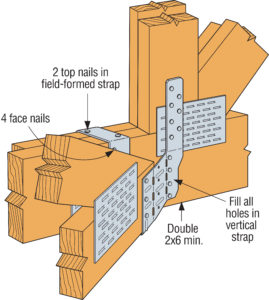
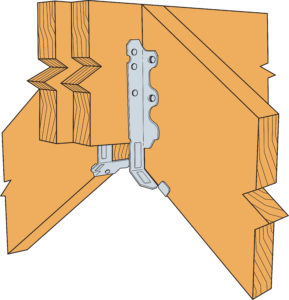
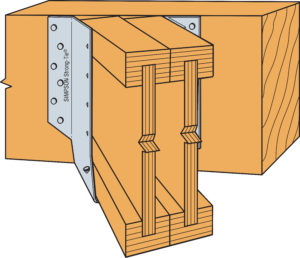
If none of these premanufactured solutions fits your specific need, you still have the option of ordering a custom-manufactured hanger. Many, but not all, joist hangers can be custom-made for specific slopes, skews, combinations of slopes and skews, and even alternative widths and alternative top-flange configurations.
If this type of hanger is needed, a good place to start is the Hanger Options Matrix on pages 98–99 of the 2019 Simpson Strong-Tie® Wood Construction Connectors catalog, available both in print and at strongtie.com. An excerpt is shown below. This chart identifies which hangers can be modified, how they can be modified, and to what extent. There are two tables — one for top-flange hangers and one for face-mount hangers. The one shown here is for top-flange hangers:
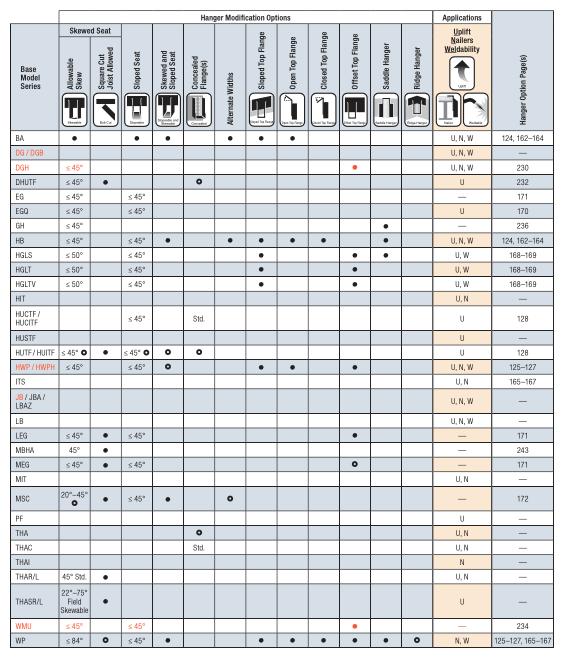
Once the user has found a hanger that can be modified to fit the actual situation, the next step is to calculate any load reductions, if applicable. The column at the far right gives the Wood Construction Connectors catalog page number that lists any load reductions for the various options. If multiple options with reductions are noted, only the most restrictive load reduction needs to be applied, not all the reductions.
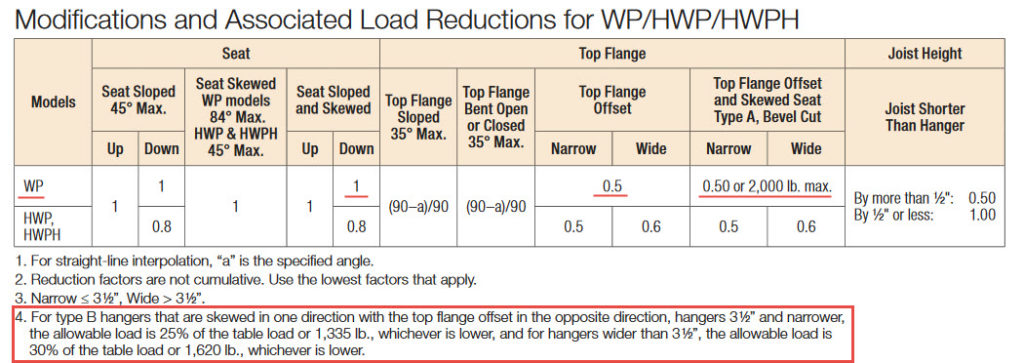
For example, let’s say we need to hang a double LVL hip member from the end of a double LVL beam using a top-flange hanger. For economy, we will first check the WP top-flange hanger, skewed 45° to the right, sloped down 45°, with its top flange offset to the left. We see from the table above that all these options are permitted. If we go to page 167 (or strongtie.com), we can see what the load reductions would be for these options. The reductions are shown in this table:
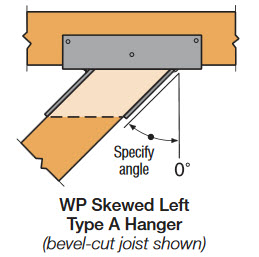
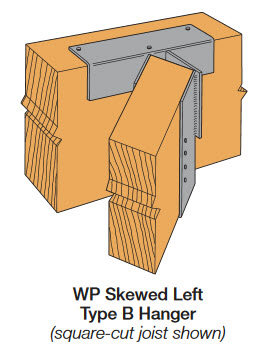
The WP shows no reduction for being sloped and skewed, but there are two slightly different reductions for having the top flange offset. To see which one applies, it must be determined whether a “Type A” or “Type B” skewed hanger is desired. Type A requires that the supported joist be bevel cut and has a standard seat skewed in the desired direction. Type B allows for square cut joists, and uses a flat plate perpendicular to the top flange to which the seat is welded. These types are illustrated below.
If we assume the supported joist will be bevel cut, then a Type A is appropriate, and the reduction for top flange offset and skewed is 0.50, with a maximum load of 2000 lbs.
So looking at the load table, we see the allowable load for an unmodified WP for a joist width of 3-1/2” and a depth of 3-1/2” to 30”, installed with two 16d common nails would be 3635 lbs. Multiplying that by the 0.50 reduction factor and rounding to the nearest 5 lbs. gives an allowable load of 1820 lbs. Finally, confirm that is less than the 2000 lbs. limit in the table.
The next thing to do is to call out the desired hanger properly so Simpson Strong-Tie can manufacture it to your needs. This is typically done by taking the regular product name, adding an X, and then calling out the modifications individually at the end.
For our hanger in the example, assuming the hip is 3 1/2″ by 9 1/4″, the standard hanger would be a WP3.56X, H=9.25, and the modified hanger would be called out as a WP3.56X, H=9.25, Skew R 45, Slope D 45, TF offset L.
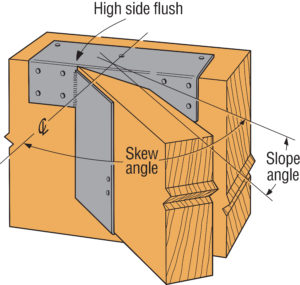
There is one final consideration when hangers are both sloped and skewed. In this case, the top of the supported member (joist) will not be horizontal when it is cut, one side will be higher than the other. The user must decide and specify where the upper side of the joist will fall. There are three options: high-side flush, center flush or low-side flush. We see that often users will want to specify high-side flush so that the joist ends up flush with the top of the supporting member, but that would be up to the user. This specification is added to the end of the callout name listed above. These cases are illustrated below:
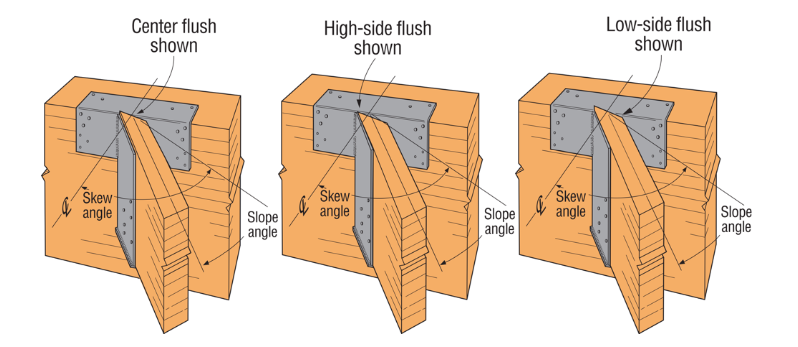
When ordering specify Low Side Flush, Center Flush or High Side Flush
A related matter occurs when the top flange of a hanger is sloped up or down. In this case the user also has to specify whether the joist is to be low-side flush, center flush, or high-side flush. However, in this case, the side is in reference to the top flange, not the joist. Specifying low-side flush will result in the top of the joist being flush with the lower side of the sloped top flange, not the low side of the joist.
If all of this seems confusing and somewhat difficult, it can be. Fortunately, Simpson Strong-Tie has developed a new web application — the Joist Hanger Selector — which automates this entire process. This app is located on strongtie.com.
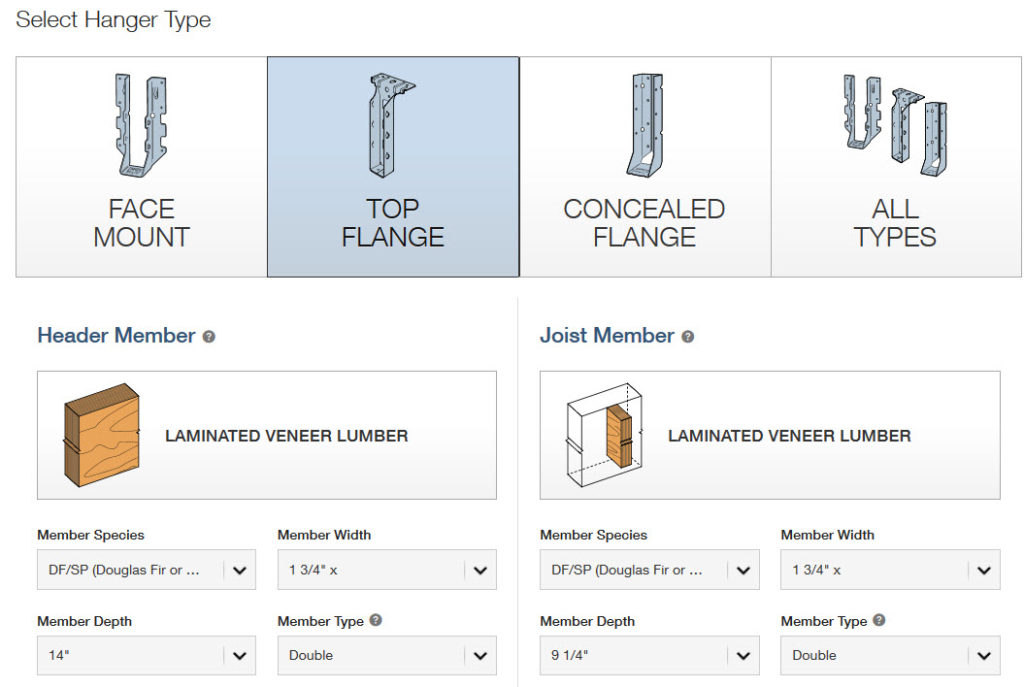
Once you agree to the terms and conditions, choose the type of hanger you want to specify, then select the types of members being connected. This is what it would look like for our example:
Then you need to specify any modifications that are required. Required loads can also be entered at this point. This is what it would look like for our example:
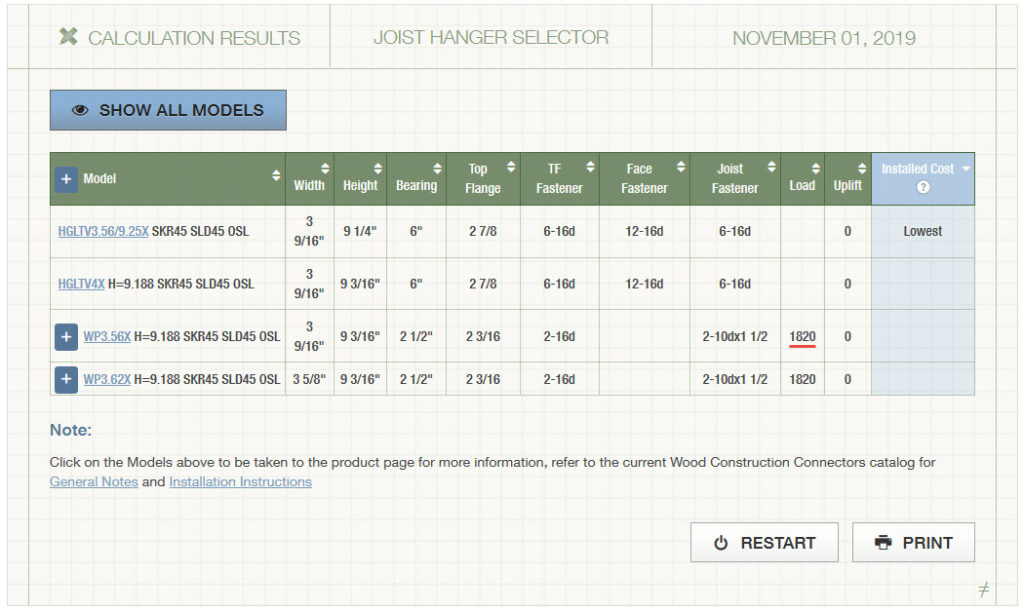
Then, just click “CALCULATE” and the possible options will be shown. And here we see our WP3.56X, Skew R 45, Slope D 45, TF offset L, with an even more detailed answer that we need to specify the Height as 9.188, not 9.25. the reason for the difference is that, for SCL and I-joist hangers, we recommend that the seat depth be reduced by 1/16″ to ensure that the top of the joist will be at least as tall as the top of the supporting member, to reduce the possibility of squeaks. And we see that the load is 1.820 which we previously calculated as the reduced allowable load. I love it when a plan comes together.
Hopefully, this web app will help you specify custom hangers with ease. In addition, there is also a downloadable Connector Selector® application that can also help users pick various types of connectors.
Are there any other applications we could develop that would make specifying connectors easier? Let us know.
The original version of this story was published on Oct 23, 2014. It has been updated to reflect new products and technology.

