

As civil and structural engineers, we know all too well that what is on the plans doesn’t always translate exactly as intended in the field. Part of what keeps our jobs interesting is having to solve problems that arise with “as built” conditions that are not always easy to change. It can feel like a complex puzzle trying to figure out what is possible when considering all aspects, including demand loads, load transfer, construction sequence, and also cost.
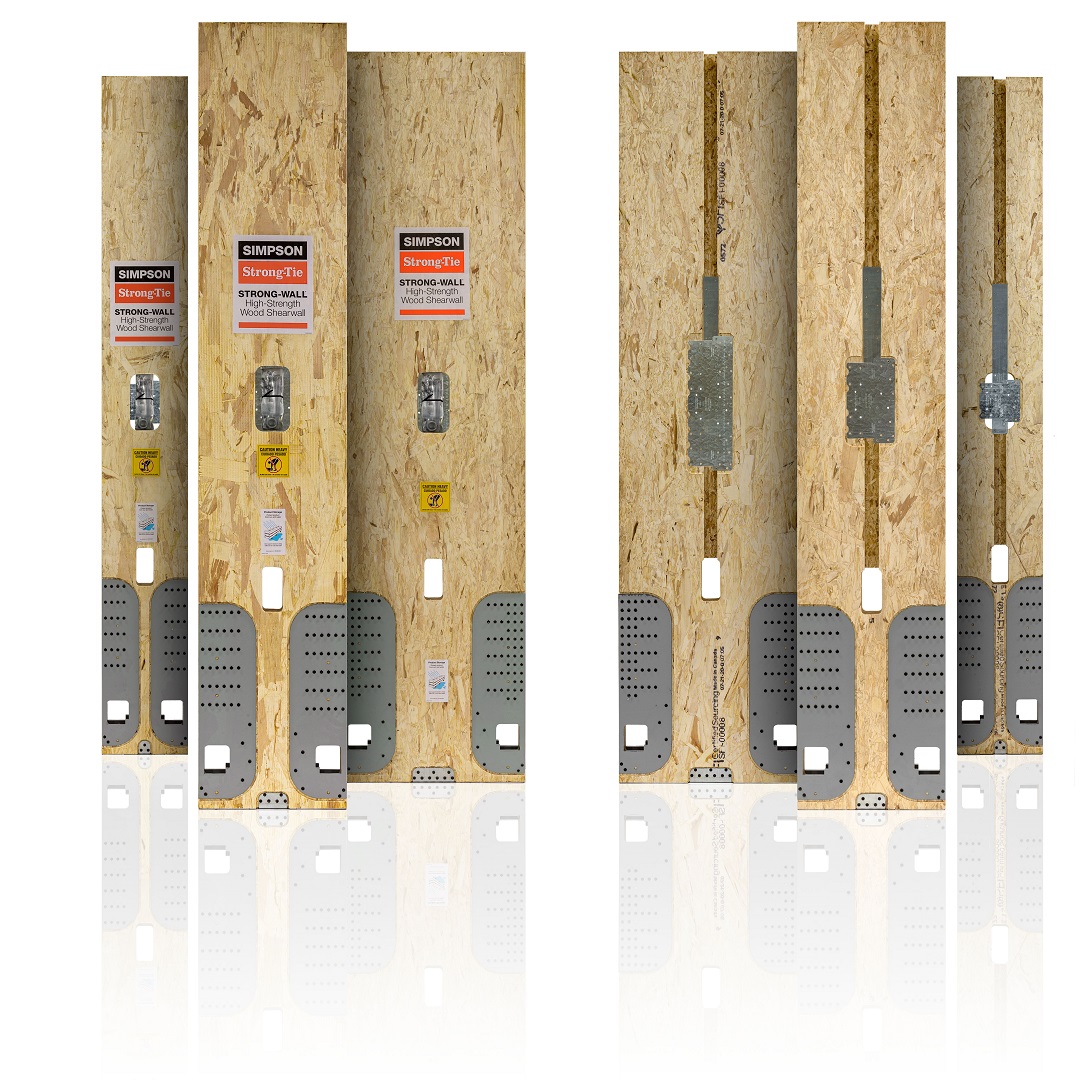
The Strong-Wall® High-Strength Wood Shearwall (WSWH) is an excellent solution for resisting lateral shear loads when there isn’t much wall length available. To successfully achieve a continuous load path, proper installation of the WSWH anchorage is as critical as the shear panel itself. The WSWH requires 1″-diameter anchor bolts with a 6 ” projection above the top of the concrete to transfer the load from the holdowns into the anchors. Simpson Strong-Tie offers a template to help contractors properly install the anchors. When the anchor bolts are set too low, two issues arise:
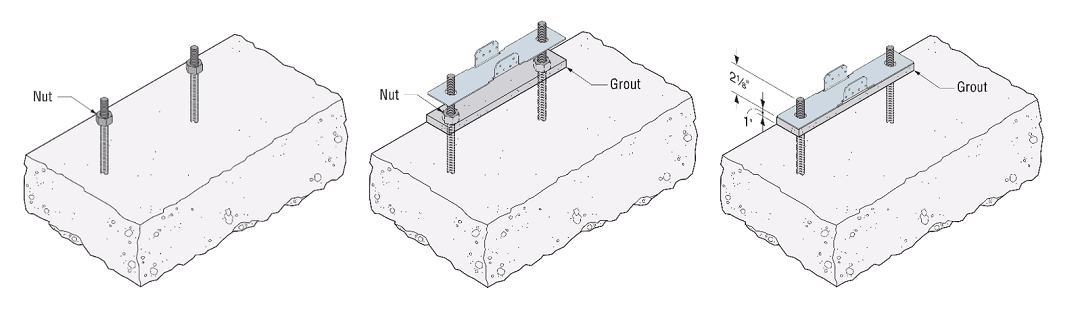
- The compression nut (which assists in transferring compression forces on laterally loaded walls) is no longer top flush with the top of the concrete.
- There are insufficient threads for WSWH nut attachment.
As a result, concrete bearing capacity and anchor bolt tension capacity may be reduced, therefore reducing the lateral capacity of the wall.
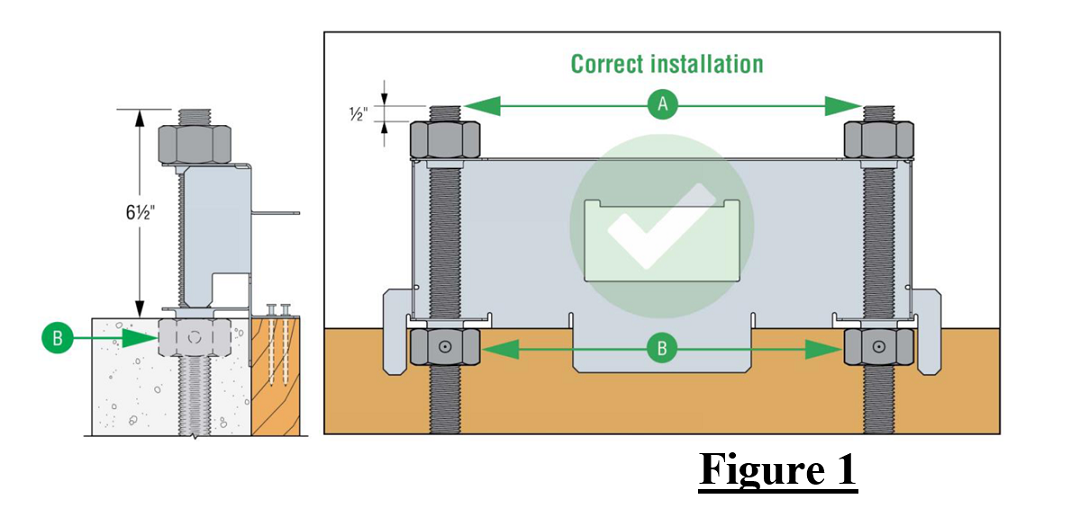
When installed properly using the anchor template, the WSWH anchors protrude 1/2″ (4 threads) above the heavy hex nut (see A in Figure 1), the compression nut is in contact with the template (see B in Figure 1), and the total bolt thread projection out of concrete should measure 6 1/2″.
There are two main issues that can cause an improper installation of the WSWH anchors:
- The anchors are not pulled snug up in the template before the concrete is poured.
- The compression nuts are not installed in a field-built anchorage assembly.
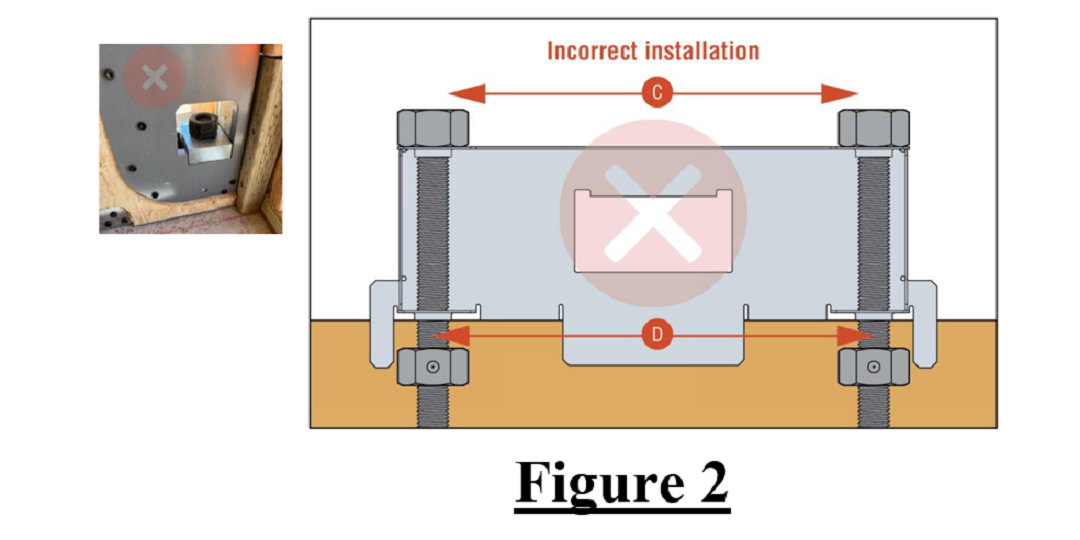
While Figure 1 above shows a correct anchor installation using the anchor template, Figure 2 below shows an incorrect installation. With the bolts set too low, there are insufficient threads for WSWH installation (see C in the illustration and in the photo), and the compression nuts are no longer flush with the top of the concrete (see D in Figure 2).
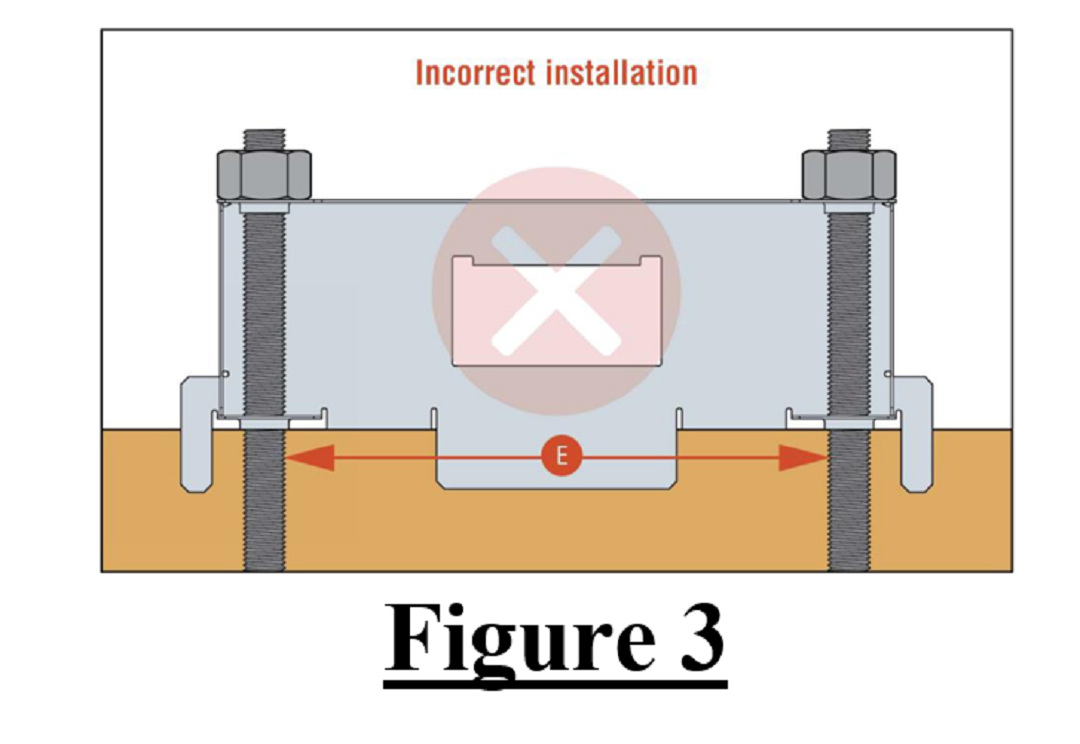
The WSWH-AB is made with the compression nut pinned to the anchor in the correct location and cannot be removed. This is one reason we recommend using the WSWH anchors instead of a field-built anchorage assembly. When there is no compression nut present (see E in Figure 3) or the compression nut is set too low (see D in Figure 2), the allowable capacity and performance of the WSWH panel will be reduced.
So what happens when the anchors are installed too low or without compression nuts and the concrete is set? In these situations, Simpson Strong-Tie is available to help. These field fixes are job specific because the reduced allowable loads need to be compared to the demand loads for that WSWH wall. Depending on the field conditions, both the tension and compression need to be analyzed. When an incorrect anchor installation happens, we urge you to call Simpson Strong-Tie so we can help. Depending on the specifics, we can check if a fix is needed and when it is, we’ll provide a recommended solution to fix the issue based on the specifics of the project. Where additional threads are needed for tension, we offer an anchor bolt extension kit. Where additional concrete bearing is needed, we also have a suggested fix. The rest of this post will explain both.
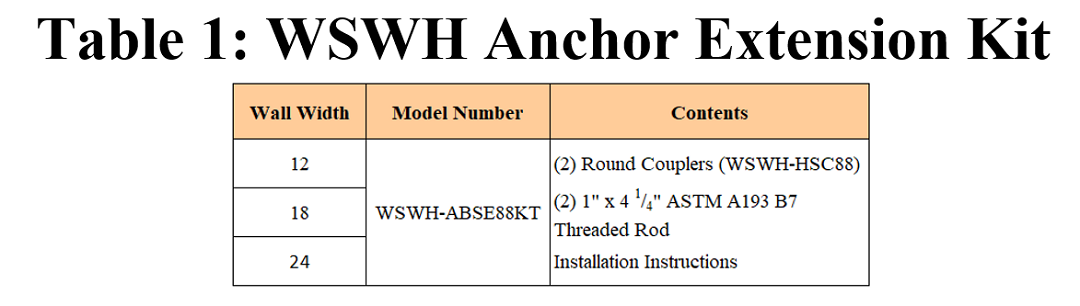
Simpson Strong-Tie has completed lateral cyclic testing in our accredited laboratory to investigate the performance of WSWH walls installed with an anchor bolt extension kit. This entails attaching a new high-strength coupler nut and all-thread rod (ASTM A193 Grade B7) to the existing WSWH anchor bolt to achieve the required length of anchor above the top of concrete.
When the WSWH-HSR is installed per our instructions, the following can be considered:
- Seismic Applications: When installed with the Simpson WSWH-HSR, the WSWH Strong-Walls will achieve 100% of their allowable capacity as published in ICC-ES ESR-2652.
- Wind Applications: When installed with the Simpson WSWH-HSR, the factors in Table 2 should be applied to the allowable shear loads and drift values for the new WSWH shearwall model listed. Models not shown in this table achieve 100% of their allowable capacity as published in ICC-ES ESR-2652.

Simpson Strong-Tie offers the following Installation Instructions:
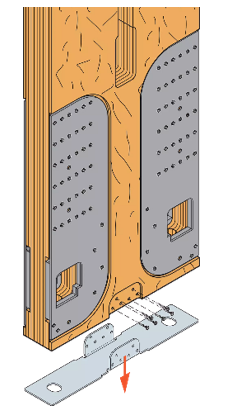
STEP 1: Remove the WSWH-BP from the bottom of the WSWH panel. Using a T25 bit, remove the 6, 12, or 18 SWS16150 screws for the WSWH12, WSWH18 and WSWH24 shearwall panels respectively.
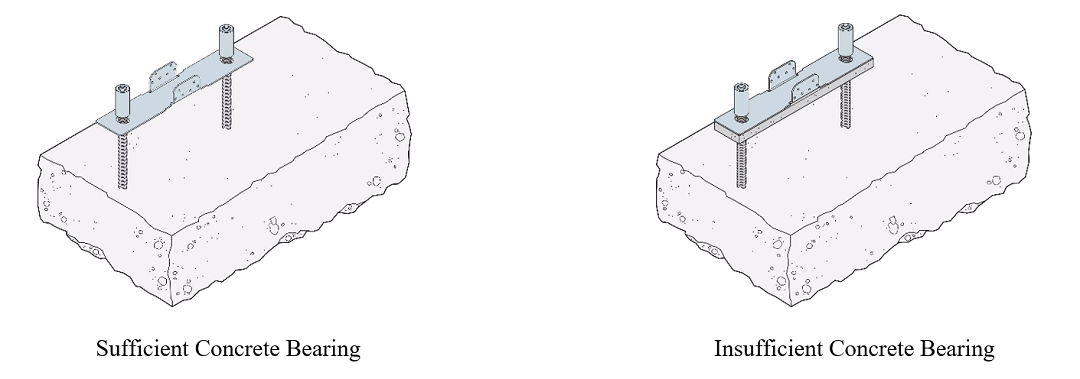
STEP 2: When Simpson Strong-Tie has determined concrete bearing is sufficient, proceed with STEP 2A.
When Simpson Strong-Tie has determined concrete bearing is insufficient, proceed with STEP 2B.
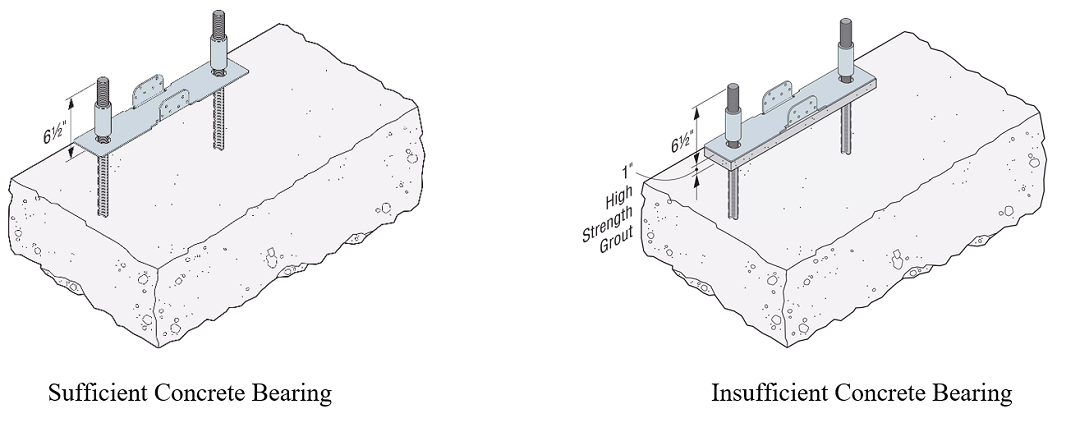
STEP 2A: SUFFICENT CONCRETE BEARING
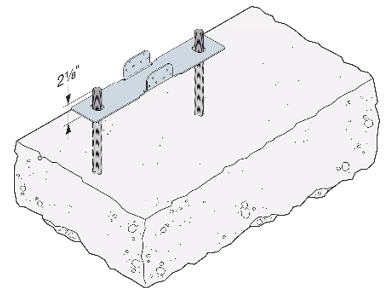
Measure the projection of the anchor from the top of the concrete to the top of the rod. This measurement should be 2 1/8 inches. If necessary, cut the anchor bolt to achieve this length using a mechanical method (do not torch cut the bolt). Place the WSWH-BP over the existing anchor bolts, flush with the top of the concrete. Proceed to STEP 3.
STEP 2B: INSUFFICENT CONCRETE BEARING
Thread one heavy hex nut per anchor down to the existing concrete. Install a new 1″-thick 5 ksi non-shrink grout pad the full width and length of the WSWH panel up to the top of nuts. Grout pad shall be level to allow full bearing of the WSWH panel. Measure the projection of the anchor from the top of the grout pad to the top of the rod. This measurement should be 2 1/8 inches. If necessary, cut the anchor bolt to achieve this length using a mechanical method (do not torch cut the bolt). The wall height may need to be adjusted at the top to accommodate the grout pad. Place the WSWH-BP over the existing anchor bolts, flush with the top of the grout. Proceed to STEP 3.
STEP 3: Thread high-strength coupler nuts onto the anchor bolts until they stop. The coupler nuts have an internal stop to prevent the rod from going all the way through.
STEP 4: Thread high-strength rod into the top of the coupler until it stops. The resulting projection will be 6 1/2″.
STEP 5: Place the WSWH panel over the extended anchors and onto the WSWH-BP.

STEP 6: Reattach the WSWH-BP using the previously removed SWS16150 screws. Install into existing holes and avoid cross threading of the wood.
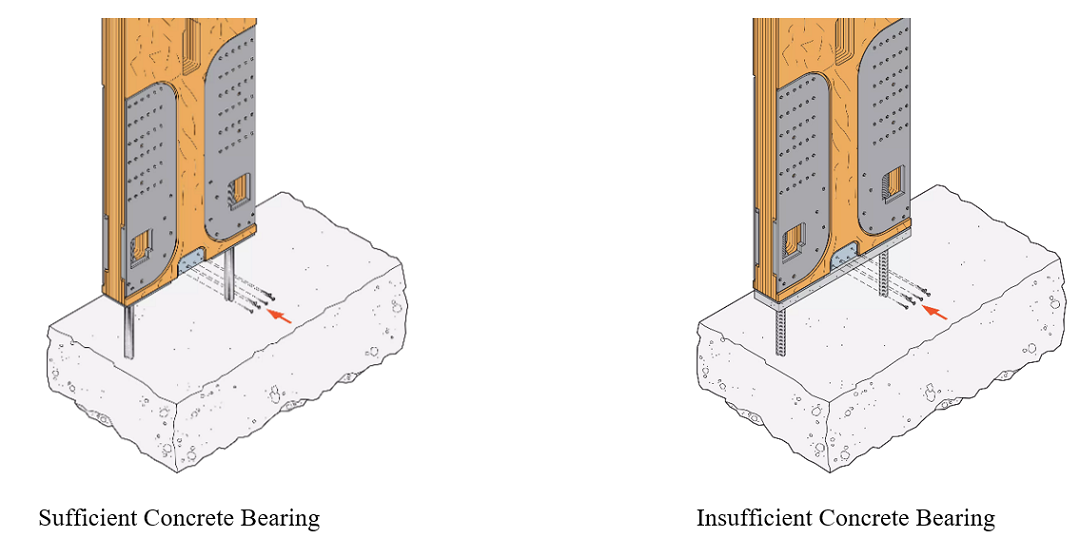
STEP 7: Install heavy bearing plate (provided with wall) over extended rod. Attach heavy hex nut (provided with wall) onto extended rod. Tighten heavy hex nut finger tight plus ½ turn.

The next time you have an anchorage issue in the field, don’t hesitate to contact us. We would love to help find a solution and get you one step further in solving your puzzle.
Two engineering letters, L-L-WSWHRETRO and L-L-WSWHABTP, are also available online for additional information.
