The New Truss Design Standard: Enter to Win A Copy of ANSI/TPI 1-2014 National Design Standard for Metal Plate Connected Wood Truss Construction

If you are like me, then you enjoy this time of the year. Instead of looking back and reviewing the events of the past year, this is the month for looking ahead at the year to come and what’s in store. So what is in store for 2015?

For the truss industry, there is a new truss design standard that was just released the last week of December. Still hot off the press, the ANSI/TPI 1-2014 standard is a revision to the 2007 edition and is referenced in the 2015 International Building Codes.

While the 2015 I-Codes might take some time for some municipalities to adopt, others are gearing up for adoption of the 2015 I-Codes as early as mid-2015. Either way, it is always good to know what is in the latest and greatest code-referenced design standards. So here’s a look at the new ANSI/TPI 1-2014 truss design standard:
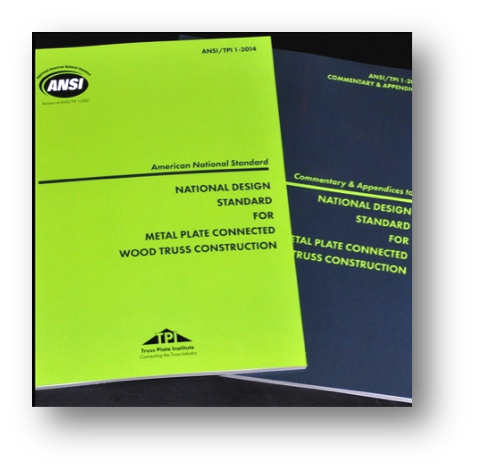
The New ANSI/TPI 1-2014 Standard

First, here is a brief primer on the TPI 1 standard. The Truss Plate Institute (TPI) published the first truss design criteria in 1960. Many updates to these design criteria followed after that, and in 1995, TPI published its first ANSI-accredited truss design standard, ANSI/TPI 1-1995. Subsequent editions of this American National Standard have included ANSI/TPI 1-2002, ANSI/TPI 1-2007, and now ANSI/TPI 1-2014. All of the TPI standards, including archived copies going all the way back to TPI-60, are available from TPI (www.tpinst.org). Here is a link to the overview of non-editorial changes from ANSI/TPI 1-2007 to ANSI-TPI 1-2014.

While the 2007 edition included many significant revisions to the previous edition, the 2014 standard has relatively few substantive changes to the 2007 edition, which is good news for those who are still trying to catch up. Chapter 2 covers the design responsibilities involved in metal plate connected wood truss construction and looks different at first glance because it has been reorganized. However, the actual “Design Responsibilities” as they were defined in TPI 1-2007 have not changed.

In short, two separate sections in TPI 1-2007, which address design responsibilities in projects that require registered design professionals and projects that do not, have now been combined into one section. The “Truss Design Engineer” is simply referred to as the “Truss Designer” and the “Registered Design Professional for the Building” is simply the “Building Designer.” If the project requires registered design professionals, then the Truss Designer and Building Designer will be registered design professionals. Regardless of whether or not those two parties are registered design professionals, their responsibilities relating to the design and application of metal plate connected wood trusses are the same, so defining those responsibilities once within the TPI standard simplifies things and makes more sense.

Not new to the wood industry, but new to TPI 1-2014, are provisions for Load and Resistance Factor Design (LRFD). AF&PA incorporated LRFD provisions into the 2005 National Design Specification (NDS) for Wood Construction, and the TPI standard has followed suit, using the same basic approach as the NDS.

The section in TPI 1-2014 with the most changes is the section on deflection criteria. The deflection criteria have been revised in the last three editions of the TPI standard. Starting in TPI 1-2002, a requirement was added to consider creep in total deflection calculations. However, specific creep factors were not specified in the standard and were only presented in the Commentary. In the 2007 edition, creep factors were moved into the standard, and the total deflection calculation explicitly specified a component due to creep of no less than 50 or 100 percent of the initial deflection for long-term loads for dry and green (wet service) use, respectively. This was consistent with the 1.5 and 2.0 creep factors specified in the NDS for total deflection calculations for seasoned and unseasoned conditions.

Between the 2007 and 2014 editions, an inconsistency was discovered between the TPI 1 deflection criteria and the deflection limits in the U.S. model building codes. While the intent of the TPI standard was to present the same basic L/xxx deflection limits for Live Load and Total Load as the model building codes, it was discovered that the IBC deflection limits for “DL + LL” were actually intended to address only the creep portion of the dead load deflection plus the immediate live load deflection. So although long-term deflection including proper creep considerations can be an important consideration in the overall design of the building, it is not intended to be used to limit the design of a truss with respect to building-code established limits on vertical deflection.
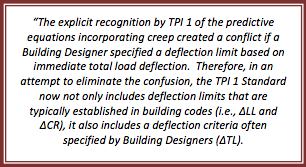
Excerpt from the ANSI/TPI 1-2014 Commentary

To resolve the issue of inconsistent methods used in the building industry to specify deflection limits, the 2014 edition now distinguishes between the following:

• “Deflection due to Live Load Plus Creep Component of Deflection due to Dead Load” for purposes of meeting the IBC deflection limits for DD + LL, which is defined as

ΔCR = Δ LL + (Kcr ‐1) x Δ DL

• “Long-Term Deflection”, which includes the full effect of creep but for which there are no explicit deflection limits specified in TPI

• “Deflection due to Total Load”, which is based on the full load (including both dead load and live load), but includes no explicit creep factors. The deflection due to total load has the same deflection limits as the IBC deflection limits for DD + LL, but this is not a mandatory check in TPI; it only applies to trusses if the Building Designer specifies that such a check due to total load be performed. Further, any consideration for creep in that calculation would also have to be specified by the Building Designer.

In recognition of the increased creep in trusses compared to solid sawn beams, the creep factors have been increased to 2.0 and 3.0 for dry and green (wet service) use, respectively. For purposes of deflection checks in accordance with the IBC, these factors reduce to 1.0 and 2.0, respectively, since the equation for “Deflection due to Live Load Plus Creep Component of Deflection due to Dead Load” uses KCR-1 rather than KCR as the factor on the immediate deflection due to dead load.

What does this all mean? For the majority of truss applications (e.g., dry-service), the effect of switching from TPI 1-2007 to TPI 1-2014 will be a change in creep factor from 1.5 to 1.0, unless additional requirements are specified by the Building Designer. Those additional requirements may include a limit on long-term deflection or a check for total load deflection (subject to the TPI deflection limits), including any considerations for creep.

A complete listing of the changes in TPI 1-2014 and more discussion about these changes are available in the TPI 1-2014 Commentary.

Now is your chance to win a copy of the ANSI/TPI 1-2014 standard for your own design library! Simply post a truss-related question, comment or idea for a future truss-related blog topic, and we will enter you into a drawing during the week of Jan 15-22. One winner will be picked at random. We look forward to hearing from you!

Truss-to-Truss and Truss-to-Everything Else Connections

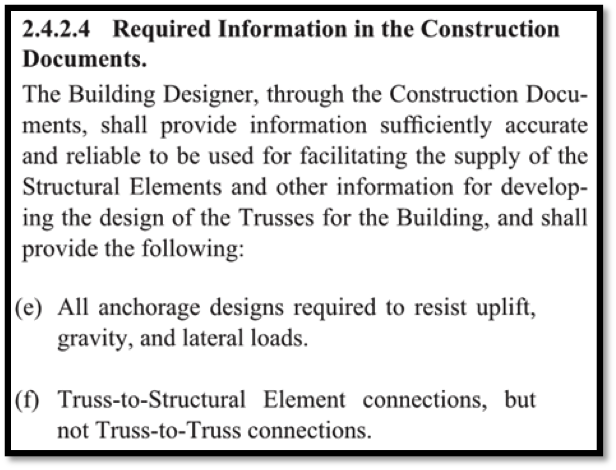
One of the questions I am asked most frequently is “Who is responsible for the truss-to-(fill in the blank) connection? One such example is the truss-to-wall connection. To answer this question, it helps to recognize there are two types of connections: a truss-to-truss connection and a “truss-to-everything-else-except-a-truss” connection. The Truss Designer is responsible for the former, and the Building Designer is responsible for the latter. Pretty simple, right?  So why all the questions?

Excerpt from ANSI/TPI 1-2007 Chapter 2 on Design Responsibilities

Some people incorrectly assume the Truss Designer is responsible for connecting the truss to everything the truss touches. Then, when the Truss Designer doesn’t specify a connection to something the truss touches (such as a wall), it prompts the question, “Hey, who is responsible for that connection? I thought the Truss Designer was!” In other cases, the person asking the question is actually challenging the answer, such as “Shouldn’t the Truss Designer be specifying the truss-to-wall connection? Why don’t they?” And finally, the question may be prompted at times when the project doesn’t have a Project Engineer (aka the Building Designer), so the question becomes, “Now who is going to specify that connection? It must be the Truss Designer, right?”

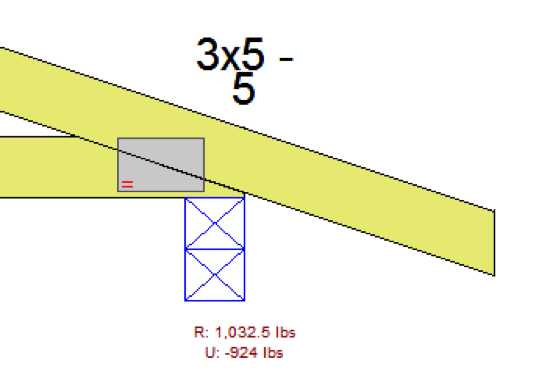
But the Truss Designer isn’t responsible for the truss-to-wall connection – and here’s why. Unless the scope of work has been expanded by contract, the Truss Designer is responsible for designing an individual component. The truss gets designed for a given set of specified loads, environmental conditions, serviceability criteria and support locations, all which are specified by the person responsible for the overall building: the Building Designer. Once designed, the truss will have a maximum download reaction and uplift reaction (if applicable) at each support location. Is that enough information to specify a truss-to-wall connection? No, it is not. First, the Truss Designer may not know what the truss is even sitting on; he or she may only know that the bearing is SPF material and 3 ½” wide. Is it a single top plate or double top plate? Is there a stud below the truss that can be connected to, or is the stud offset? Or, is the truss sitting on a header spanning across a wide window?

Sample Truss Reactions

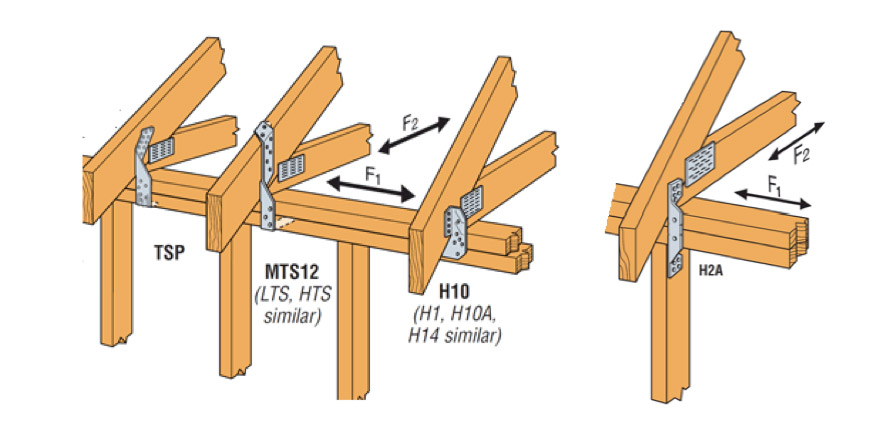
Second, even if the Truss Designer had all of the information regarding the bearing conditions, there is another problem. The Truss Designer has the reactions resulting from the loads applied to the truss. What about the reaction at the top of the wall (perpendicular to the wall) resulting from the lateral loads applied to that wall? And the shear loads acting parallel to the wall as a result of lateral loads applied to the end wall? These loads also need to be resisted by the truss-to-wall connection (hence, the F1 and F2 allowable loads that are published for hurricane ties), so the Truss Designer cannot select an adequate truss-to-wall connection based on the truss reactions alone.

Truss-to-Top Plate and Truss-to-Stud Connections

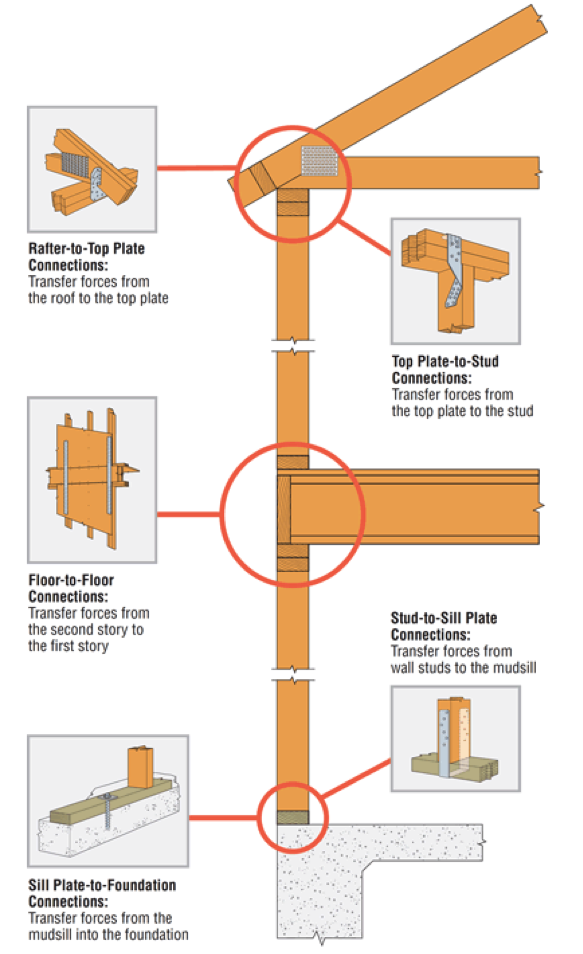
Finally, there’s one more scenario to consider. Say a Building Department requires that truss-to-wall connections must be specified by the Truss Designer on projects that have no Engineer of Record. It wants to ensure trusses are adequately secured to the walls, and the Truss Designer may seem best equipped to determine those connections (this has actually happened in some places). The Truss Designer can find out what exactly the truss is sitting on, and can even calculate some approximate reactions for the top of the wall to conservatively take into account during the selection of the connection. Problem solved? Not entirely. That takes care of the top of the wall, but the load doesn’t stop there. So requiring the Truss Designer to specify the truss-to-wall connection only transfers the problem to the bottom of the wall. Who is going to address those connections?

Continuous Load Path

While most people don’t think of the Truss Designer as being the person responsible for the connections at the bottom of the wall, many do think the Truss Designer should be responsible for the connections at the top of the wall. But because someone – namely, the Building Designer – still needs to ensure that a continuous load path has been satisfied by the connections in the building, does it really help to increase the scope of work of the Truss Designer to specify the truss-to-wall connection?

Let us know your thoughts in the comments below.

Snow Loads vs. Top Chord Live Loads – A Historical Look at Snow Loading for Trusses

In my former life working as a consulting engineer, I reviewed many truss submittal packages. I remember during my reviews wondering how it was possible to get so much information on to an 8½ inch by 11 inch piece of paper. I also remember how a lot of what was being reported was difficult to understand without some help interpreting the information. 

As many of you may know, Simpson Strong-Tie has ventured into the truss industry and we are now offering truss connector plates and software to component manufacturers around the country. So given my past experiences, I figure some of you might appreciate some insight into the engineering that goes on behind those truss submittal packages. So I have asked one of our great truss engineers, Kelly Sias, to put together some blog posts on the topic that we can share our knowledge with you. Kelly has worked in the truss industry for years and spent time as the Technical Director at the Truss Plate Institute. I am sure her blog posts are going to help all of us have a better appreciation for trusses.

Have you ever been involved in a discussion with someone on a project that ended with “but that’s the way we’ve always done it!”? I heard those words spoken by a contractor in my first engineering job when I tried explaining why his single stud would not work at a particular location. When he said something about his grandfather having always done it that way, I knew I could explain the calculations all day and it wouldn’t do much good.Continue Reading

Plated Wood Truss Hip End Styles

For many, the first day of summer means it is time to cinch up your favorite hip-hugging bathing suit and enjoy the warm weather. For the truss industry, it’s time to keep those hip-hugging bathing suits in the closet and take advantage of the favorable weather months by bidding and building as many jobs as possible. During the bid and build frenzy, there will be several hip end jobs leaving truss yards across the country, but what exactly is a hip end and what are the different styles?

Truss hip ends drawing
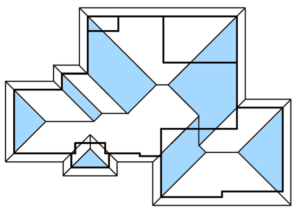
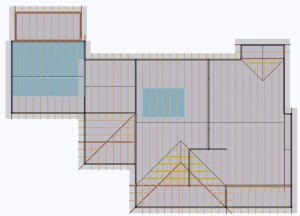
Roof with Multiple Hip Ends (blue), Plan View

The Structural Building Components Association website (SBCA) defines a hip roof as a “Roof system in which the slope of the roof at the end walls of the building is perpendicular to the slope of the roof along the sides of the building.” While framing terms differ by region, most trussed hip end systems will include hip trusses, jack trusses (end and side) and a rafter or corner girder truss. Hip end style and setback (distance from side or end walls to the hip girder truss) may also vary by building design and region.

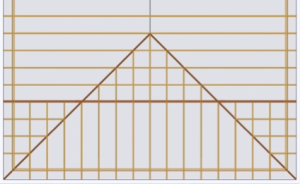
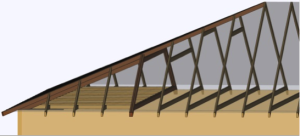
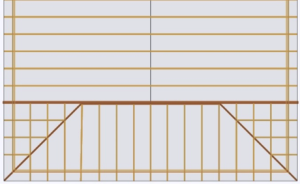
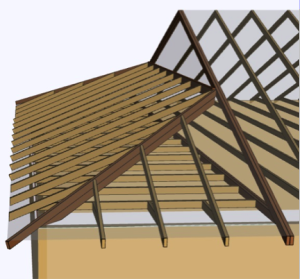
In the western part of the country, a California Hip system is typically seen in many trussed structures. In this hip system, the hip truss flat top chord is dropped by the plumb cut of the jack top chord at the roof pitch. By doing this, the top chords of the end jack trusses can pass over and bear on the dropped flat top chords. As the height of the hip end roof plane increases, the height of the flat top chord also increases, though the interval at which the flat top chord height increases may vary by building design and region.

Truss Design: California Hip System
California Hip System, Plan View
Truss Design: California Hip Rendering
California Hip System, Rendering

East of the Rocky Mountains, the California Hip is rare and a Step-Down Hip system is more popular. Differing from the California Hip, a Step-Down Hip system is one where every truss under the hip end plane decreases in height, or “steps down” from the apex until it reaches the hip girder, which is placed at a pre-determined setback.

Step Down Hip System, Plan View
Step Down Hip System, Rendering

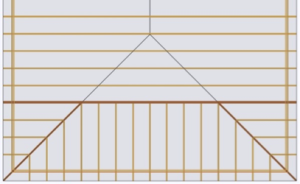
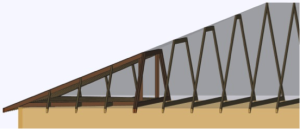
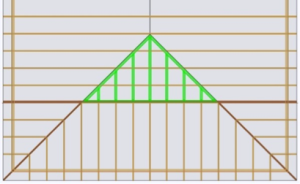
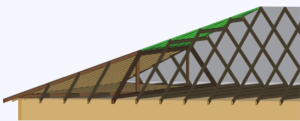
Less regional and more situational depending on the building design, are the Lay-In Gable, Dutch and Terminal Hip systems. The Lay-In Gable Hip system is one with many regional names and shares similarities with the California and Step Hip systems. Like the Step Hip, every truss steps down moving from the apex to the setback. Like the California, every truss flat top chord has a drop. However, the flat top chord is dropped by the plumb cut of a 1.5” member at the roof pitch, as the gable frame lays flat.

Roof System: Lay-In Gable Hip System, Plan View
Lay-In Gable Hip System, Plan View (Gable Frame shown in green for clarity)


Lay-In Gable Hip System, Rendering

In a Dutch Hip system, the hip end roof plane does not converge with the side planes to form an apex. Instead, the hip end plane pitches directly into the girder truss that is placed at a predetermined setback. Jack trusses then connect to the hip girder truss or to a ledger attached to the hip girder truss.  This hip system is also referred to as a Dutch Gable.

Dutch Hip System, Plan View
Dutch Hip System, Rendering

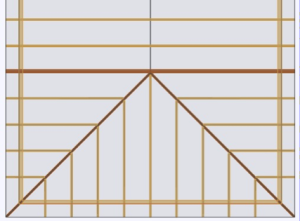
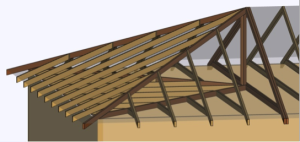
Assuming like roof pitches and heel heights, a Terminal Hip system is one where the hip girder truss setback is half of the main truss span or building width. If pitches and heel heights vary, the girder truss is placed at the apex of the three converging roof planes, which could be more or less than half of the main truss span or building width.

Terminal Hip System, Plan View
Terminal Hip System, Plan Rendering
Terminal Hip System, Plan Rendering 

While these are some common hip end styles in the truss industry, there are definitely others. Each style has its own advantages and disadvantages, and a discussion of those will be the topic of a future post.

What other types of hip end styles are you familiar with? Let us know in the comment section below.

Plated Wood Truss Design Responsibilities

When the opportunity presents itself, glance up at the ceiling. Do you ever wonder who the responsible parties were for the design and construction of the roof above? If you’re involved in the truss industry, there is no doubt you have. If not, it never hurts to be in the know. Since we spend a significant portion of our life under a roof, it helps to know a few facts about what’s over our heads.

Truss drawing
Truss drawing

Roofs built from prefabricated wood trusses used in light-frame and residential construction will be the focus of this blog post.

The current national design standard for metal plate connected wood truss construction is ANSI/TPI 1-2007, which is the referenced standard in the 2009 and 2012 IBC and IRC. So what are design responsibilities for wood trusses and why are they important? They are a series of responsibilities required by key parties for applications of trusses in the construction of a building. These key parties (Owner, Building Designer, Registered Design Professional, etc.) are important because each is required to produce pertinent information about the truss and truss system from its inception to erection and long in-service life.

Plan
Plan
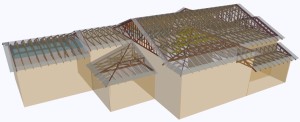
Rendering of Trusses

As wood trusses have evolved, so have publications about their construction, quality and use.  The first standard was published in 1960, with subsequent standards published periodically.

In 1995, the Truss Plate Institute (TPI) published ANSI/TPI 1-1995, which served as the first ANSI consensus-based national design standard for metal-plate connected wood truss construction. One of many new chapters established in ANSI/TPI 1-1995 was chapter 2, identifying design responsibilities. While early versions of ANSI/TPI 1 introduced design responsibilities, chapter 2 of ANSI/TPI -2007 has clarified and added areas of responsibility that are vital for today’s component industry. In addition, the 2007 edition defined responsibilities regarding temporary and permanent restraint and bracing, and special inspection requirements to long span trusses (any truss with a span of 60 feet or greater). These are just a few, yet critical additions to the standard.

Without clear definitions of responsibility, how would the industry know who specifies truss connections, or who provides bracing locations necessary to a roof assembly and its duration of service? Additionally, who determines if a project requires a truss submittal package, or the type of information it must provide? While these questions and more are answered in ANSI/TPI 1-2007, any provisions of the TPI 1 Design Responsibilities can be changed in the contract documents for a given project, so long as all parties are made aware of and agree to the revisions.

Ensuring all parties’ know and follow the design standard can help ensure a properly designed, manufactured and erected truss that will lead to a safe roof system. If you’re a component manufacturer, knowing what you’re responsible for and required to produce can get you out of a jam or better yet, help you avoid one altogether. Communication is key to the industry. The Commentary and Appendices of ANSI/TPI 1-2007 is available for web review: http://www.tpinst.org/technical-downloads

ANSI TPI 1
ANSI TPI 1

Do you know or want to know the answers to the above questions? Or perhaps think there are responsibilities that need to be clarified or added to future publications of ANSI/TPI 1? Let us know in the comment section below.