Hurricane Strong

This week will see the ultimate combination of events intended to raise public awareness of the necessity for disaster-resistant construction: It is week three of ICC’s Building Safety Month; National Hurricane Preparedness Week, as proclaimed by the U.S. president; the  NOAA Hurricane Awareness Tour of the Gulf Coast; and the kickoff of the new HurricaneStrong program.

hurricanestrong1

The ICC says that “Building Safety Month is a public awareness campaign to help individuals, families and businesses understand what it takes to create safe and sustainable structures. The campaign reinforces the need for adoption of modern, model building codes, a strong and efficient system of code enforcement and a well-trained, professional workforce to maintain the system.” Building Safety Month has a different focus each week for four weeks.  Week One is “Building Solutions for All Ages.”  Week Two is “The Science Behind the Codes.”  Week Three is “Learn from the Past, Build for Tomorrow.” Finally, Week Four is “Building Codes, A Smart Investment.” Simpson Strong-Tie is proud to be a major sponsor of Week Three of Building Safety Month.

hurricanestrong2

National Hurricane Preparedness Week is recognized each year to raise awareness of the threat posed to Americans by hurricanes. A Presidential Proclamation urged Americans to visit www.Ready.gov and www.Hurricanes.gov/prepare to learn ways to prepare for dangerous hurricanes before they strike. Each day of the week has a different theme. The themes are:
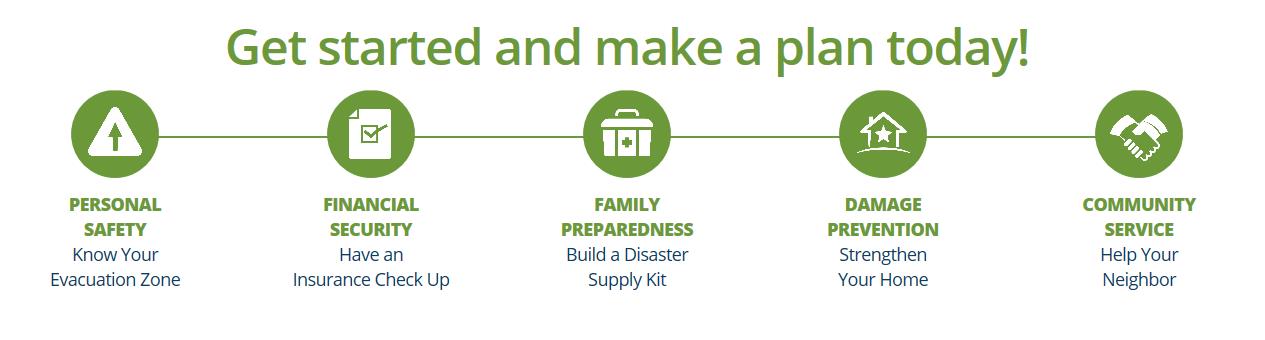
⦁ Determine your risk; develop an evacuation plan
⦁ Secure an insurance check-up; assemble disaster supplies
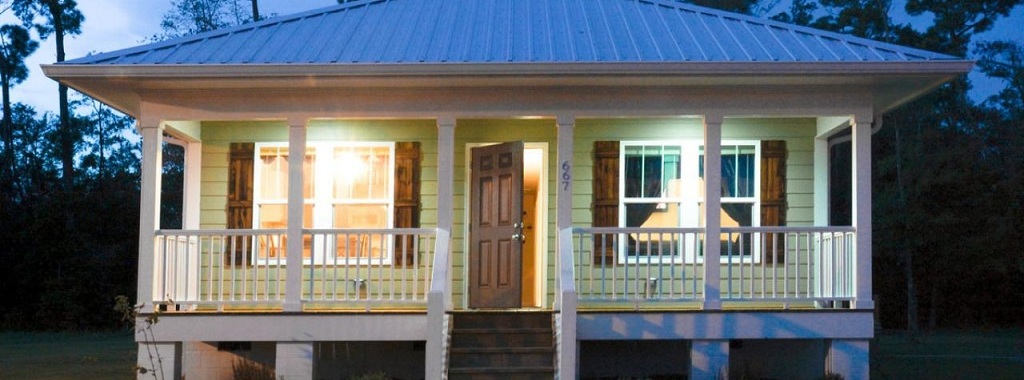
⦁ Strengthen your home
⦁ Identify your trusted sources of information for a hurricane event
⦁ Complete your written hurricane plan.

hurricanestrong3

hurricanestrong4

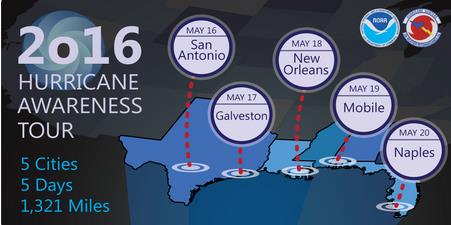
This week also marks the NOAA Hurricane Awareness Tour, where NOAA hurricane experts will fly with two of their hurricane research aircraft to five Gulf Coast Cities. Members of the public are invited to come tour the planes and meet the Hurricane Center staff along with representatives of partner agencies. The goal of the tour is to raise awareness about the importance of preparing for the upcoming hurricane season. The aircraft on the tour are an Air Force WC-130J and a NOAA G-IV. These “hurricane hunters” are flown in and around hurricanes to gather data that aids in forecasting the future of the storm. As with Hurricane Preparedness Week, each day of the tour features a different theme.  Simpson Strong-Tie is pleased to be a sponsor for Thursday, when the theme is Strengthen Your Home.  Representatives from Simpson Strong-Tie will be attending the event on Thursday to help educate homeowners on ways to make their homes safer.

hurricanestrong5

hurricanestrong6

Finally, this week is the official kickoff of a new hurricane resilience initiative, HurricaneStrong. Organized by FLASH, the Federal Alliance for Safe Homes and in partnership with FEMA, NOAA and other partners, the program aims to increase safety and reduce economic losses through collaboration with the most recognized public and private organizations in the disaster safety movement. HurricaneStrong is intended to become an annual effort, with activities starting prior to hurricane season and continuing through the end of the hurricane season on November 30. To learn more, visit www.hurricanestrong.org.


Experts consider these public education efforts to be more important every year, as it becomes longer since landfall of a major hurricane and as more and more people move to coastal areas. The public complacency bred from a lull in major storms has even been given a name: Hurricane Amnesia.


All these efforts may be coming at a good time, assuming one of the hurricane season forecasts is correct. A forecast from North Carolina State predicts an above-average Atlantic Basin hurricane season. On the other hand, forecasters at the Department of Atmospheric Science at Colorado State University are predicting an approximately average year.


Are you prepared for the natural hazards to which your geographic area is vulnerable? If not, do you know where to get the information you need?


Habitat STRONG Blog

This week’s post was written by Kevin Gobble of Habitat for Humanity. Kevin is the Program Manager for Habitat for Humanity’s new Habitat Strong initiative. Kevin has spent over 22 years in residential construction building energy-efficient, high-performing home, and has consulted with several sustainable building programs on ways to develop their own best practices. As a third-generation builder, he has knowledge in the field of residential building science and has furthered his education to include many industry certifications — NARI Certified Remodeler, NAHB Certified Green Professional, RESNET Certified Green Rater, BPI Building Analyst, FORTIFIED evaluator, and Level 1 Infrared Thermography — while working directly with industry partners to focus on cost-effective construction solutions. Kevin has built and remodeled numerous homes to high-performance standards as certified by various building programs, including his latest project for himself: converting a condemned historic property in Atlanta to EarthCraft House Platinum.

In a previous blog post, we discussed the background of the Habitat Strong program. Habitat Strong promotes the building of resilient homes that are better equipped to withstand natural disasters in every region of the country. This program uses IBHS FORTIFIED Home™ standards and works well within Habitat’s model of building affordable, volunteer-friendly homes.Continue Reading

Coating Evaluation for Fasteners – Code-Approved and Alternative Coatings

Who likes red rust? No one I know! How do we avoid corroding of fasteners? Corrosion can be controlled or eliminated by providing a corrosion-resistant base metal or a protective finish or coating that is capable of withstanding the exposure environment. When fasteners get corroded, they not only look bad from outside but can also lose their load capacity. To ensure continued fastener performance, we have to control for corrosion. This blog focuses on evaluating the corrosion resistance of the fasteners.

What does the building code specify?

For use in preservative-treated wood, the IBC-2015 specifies fasteners that are hot-dipped galvanized, stainless steel, silicon bronze or copper. Section 2304.10.5.1 of IBC-2015 (Figure 1) covers fastener and connector requirements for preservative-treated wood (chemically treated wood). While chemically treated wood is part of the corrosion hazard, it is not the whole corrosion hazard. Weather exposure, airborne chemicals and other environmental conditions contribute to the corrosion hazard for metal hardware. In addition, the main issue with the code-referenced requirements for fasteners and connectors used with preservative-treated wood is that not all preservative treatments deliver the same corrosion hazard and not all fasteners can be hot-dip galvanized.

Figure 1: Section 2304.10.5.1 IBC-2015.

What if we want to use an alternative base material or coating for fasteners?

How do we evaluate the corrosion resistance of the alternative material or coating? The codes do not provide test methods to evaluate alternate materials and coatings. However, the International Code Council–Evaluation Service (ICC-ES) developed acceptance criteria to evaluate alternative coatings that are not code recognized for use in different environments. The purpose of acceptance criteria ICC-ES AC257, Acceptance Criteria for Corrosion-Resistant Fasteners and Evaluation of Corrosion Effects of Wood Treatment Chemicals, is twofold: (1) to establish requirements for evaluating the corrosion resistance of fasteners that are exposed to wood-treatment chemicals, weather and salt corrosion in coastal areas; and (2) to evaluate the corrosion effects of wood-treatment chemicals. In this blog post, we will concentrate on the evaluation of corrosion resistance of fasteners. The criteria provide a protocol to evaluate the corrosion resistance of fasteners where hot-dip galvanized fasteners serve as a performance benchmark. The fasteners evaluated by these criteria are nails or screws that are exposed directly to wood-treatment chemicals and that may be exposed to one or more corrosion accelerators like high humidity, elevated temperatures, high moisture or salt exposure.

The fasteners may be evaluated for any of the four exposure conditions:

  1. Exposure Condition 1 with high humidity. This test can be used to evaluate fasteners that could be exposed to high humidity. Typical applications that fall under this category are treated wood in dry-use applications.
  2. Exposure Condition 2 with untreated wood and salt water. This test can be used to evaluate fasteners that are above ground but exposed to coastal salt exposure.
  3. Exposure Condition 3 with chemically treated wood and moisture. This test covers all the general construction applications.
  4. Exposure Condition 4 with chemically treated wood and salt water. Typical applications include coastal construction applications.

Depending on the exposure condition being used for fastener evaluation, the fasteners are installed in wood that could be either chemically treated or untreated. Then the wood and the fasteners are placed in the chamber and artificially exposed to the evaluation environment. Two types of test procedures are to be completed for exposure condition 2 through 4. The purpose of these tests is not to predict the corrosion resistance of the coatings being evaluated, but to compare them to fasteners with the benchmark coating (ASTM A153, Class D) in side-by-side exposure to the accelerated corrosion environment.

ASTM B117 Continuous Salt-Spray Test

ASTM B117 is a continuous salt-spray test. For Exposure Condition 3, distilled water is used instead of salt water. The fasteners are continuously exposed to either moisture or salt spray in this test, and the test is run for about 1,440 hours after which the fasteners are evaluated for corrosion. This is an accelerated corrosion test that exposes the fasteners to a corrosive attack so the corrosion resistance of the coatings can be compared to a benchmark coating (hot-dip galvanized).

ASTM G85, Annex A5

The second test is ASTM G85, Annex A5 which is a cyclic test with alternate wet and dry cycles. The cycles are 1-hour dry-off and 1-hour fog alternatively. This is a cyclic accelerated corrosion test and relates more closely to real long-term exposure. This test is more representative of the actual environment than the continuous salt-spray test.  As in the ASTM B117 test, the fasteners along with the wood are exposed to 1,440 hours, after which the corrosion on the fasteners is evaluated and compared to fasteners with the benchmark coating.

Test Method and Evaluation

The test process involves installing 10 benchmark fasteners along with 10 fasteners for each alternative coating being evaluated. The fasteners are arranged in the wood with a spacing of 12 times the fastener diameter between the fasteners. A kerf cut is provided in the wood between the fasteners to isolate the fasteners as shown in Figure 2 and to ensure elevated moisture content in the wood surrounding the fastener shank. The moisture and retention levels of the wood are measured, and the fasteners are then installed in the chamber as shown in Figure 3 and exposed to the designated condition. The test is run for the period specified, after which the fasteners are removed, cleaned and compared to the benchmark for corrosion evaluation. Figure 4 shows the wood and fastener heads after 1,440 hours (60 days). The heads and shanks of the fasteners are visually graded for corrosion in accordance with ASTM D610. If the alternate coating performs equivalent to or better than the benchmark coating — that is, if the corrosion is no greater than in the benchmark — then the coating has passed the test and can be used as an alternative to the code-approved coating. Figure 5 shows the benchmark and alternative fasteners that are removed from the chamber after 1,440 hours.

As you can see, the alternative coatings have to go through extended and rigorous testing and evaluation as part of the approval process before being specified for any of the fasteners. Some alternative coatings provide even better corrosion resistance than the code recognized options. Sometimes, also, the thickness of these alternative coatings may be smaller than the thick coating required for hot-dip galvanized parts. Some of our coatings, such as the Double-Barrier coating, the Quik Guard® coating and the ASTM B695 Class 55 Mechanically Galvanized have gone through this rigorous testing and have been approved for use in preservative-treated wood in the AC257 Exposure Conditions 1 and 3. In addition, these coatings have been qualified for use with chemical retentions that are typical of AWPA Use Category 4A – General Ground Contact. No salt is found in AC257 Exposure Conditions 1 and 3. Please refer to our Fastener Systems Catalog, C-F-14, pages 13–15 for corrosion recommendations and pages 16–17 for additional information on coatings.

What do you look for specifically in a fastener? Do you have a preference for a certain coating type or color? Let us know in the comments below!

Figure 2: Fasteners with different coatings along with the benchmark, installed in wood and separated by kerf cuts.
Figure 3: Fasteners and wood pieces installed in the chamber.
Figure 4: Snap shot of fasteners in ASTM B117 chamber after 1,440 hours.
Figure 5: Fasteners after 1,440 hours of exposure, removed from the wood, cleaned and compared to benchmark. Coating 1 – Benchmark (Hot- dip Galvanized) and Coating 2 (Alternative coating).

Simultaneous Loading on Hurricane Ties

“Structures are connections held together by members” (Hardy Cross)

I heard this quote recently during a presentation at the Midwest Wood Solutions Fair. I had to write it down for future reference because of course, all of us here at Simpson Strong-Tie are pretty passionate about connections. I figured it wouldn’t take too long before I’d find an opportunity to use it. So when I started to write this blog post about the proper selection of a truss-to-wall connection, I knew I had found my opportunity – how fitting this quote is!

There are plenty of photos of damage wrought by past hurricanes to prove that the connection between the roof and the structure is a critical detail. In a previous blog  post, I wrote about whose responsibility it is to specify a truss-to-wall connection (hint: it’s not the truss Designer’s).  This blog post is going to focus on the proper specification of a truss-to-wall connection, the methods for evaluating those connections under combined loading and a little background on those methods (i.e., the fun stuff for engineers).

hurricane1

Take a quick look at a truss design drawing, and you will see a reaction summary that specifies the downward reaction, uplift and a horizontal reaction (if applicable) at each bearing location. Some people are tempted to look only at the uplift reaction, go to a catalog or web app, and find the lowest-cost hurricane tie with a capacity that meets or barely exceeds the uplift reaction.

hurricane2

However, if uplift was the only loading that needed to be resisted by a hurricane tie, why would we publish all those F1 and F2 allowable loads in our catalog?

hurricane3

Of course, many of you know that those F1 and F2 allowable loads are used to resist the lateral loads acting on the end and side walls of the building, which are in addition to the uplift forces.  Therefore, it is not adequate to select a hurricane tie based on uplift reactions alone.

Excerpt from BCSI (2015 Version)

Where does one get the lateral loads parallel and perpendicular to the plate which must be resisted by the truss-to-wall connection? Definitely not from the truss design drawing! Unless otherwise noted, the horizontal reaction on a truss design should not be confused with a lateral reaction due to the wind acting on the walls – it is simply a horizontal reaction due to the wind load (or a drag load) being applied to the truss profile. It is also important to note that any truss-to-wall connection specified on a truss design drawing was most likely selected based on the uplift reaction alone. There may even be a note that says the connection is for “uplift only” and does not consider lateral loads. In this case, unless additional consideration is made for the lateral loads, the use of that connector alone would be inadequate.

Say, for example, that the uplift and lateral/shear load requirements for a truss-to-wall connection are as follows:

Uplift = 795 lb.

Shear (parallel-to-wall) = 185 lb.  (F1)

Lateral (perp-to-wall) = 135 lb.  (F2)
Based on those demand loads, will an H10A work?

hurricane5

An initial look at the H10A’s allowable loads suggests it might be adequate. However, when these loads are entered into the Connector-Selector, no H10A solution is found.

Combined Uplift, F1 and F2 Loads

Why? Because Connector-Selector is evaluating the connector for simultaneous loading in more than one direction using a traditional linear interaction equation approach as specified in our catalog:

hurricane7

If the shear and lateral forces were to be resisted by another means, such that the H10A only had to resist the 795 lb. of uplift, then it would be an adequate connector for the job. For example, the F1 load might be resisted with blocking and RBC clips, and the F2 loads might be resisted with toe-nails that are used to attach the truss to the wall prior to the installation of the H10A connectors. However, if all three loads need to be resisted by the same connector, then the H10A is not adequate according to the linear interaction equation.

Uplift Only
Uplift Only

Some might question how valid this method of evaluation is – Is it necessary? Is it adequate? How do we know? And that is where the interesting information comes in. Several years ago, Simpson Strong-Tie partnered with Clemson University on an experimental study with the following primary objectives:

1. To verify the perceived notion that the capacity of the connector is reduced when loaded in more than one direction and that the linear interaction equation is conservative in acknowledging this combined load effect.

2. To propose an alternative, more efficient method if possible.

Three types of metal connectors were selected for this study – the H2.5A, H10, and the META20 strap – based on their different characteristics and ability to represent general classes of connectors. The connectors were subjected to uni-axial, bi-axial and tri-axial loads and the normalized capacities of the connectors were plotted along with different interaction/design surfaces.

These interaction plots were used to visualize and parameterize the combined load effect on the capacity of the connectors. The three different interaction plots that were examined were the traditional linear relationship, a quadratic interaction surface and a cuboid design space.

Tri-axial Test Frame
Interaction plot for tri-axial loads on a cuboid design space

The results?  Not only was the use of the linear interaction equation justified by this study, but a new, more efficient cuboid design surface was also identified. It provides twice the usable design space of the surface currently used for tri-axial loading and still provides for a safe design (and for the bi-axial case, it is even more conservative than the linear equation). This alternative method is given in our catalog as follows:

hurricane11

Now we can go back to the H10A and re-evaluate it using this alternative method:

hurricane12

As it turns out, the H10A does have adequate capacity to resist the simultaneous uplift, shear and lateral loads in this example. This just goes to show that the alternative method is definitely worth utilizing, whenever possible, especially when a connector fails the linear equation.

For more information about the study, see Evaluation of Three Typical Roof Framing-to-Top Plate/Concrete Simpson Strong-Tie Metal Connectors under Combined Loading.

What is your preferred method for resisting the combined shear, lateral and uplift forces acting on the truss-to-wall connections? Let us know in the comments below!

Fine Homebuilding Video Series: How to Build a Deck

We’re partnering with folks at Fine Homebuilding on a video series on how to build a deck that is code compliant and that highlights the critical connections of a deck. This series is called Ultimate Deck Build 2016. The video series comprises five videos that walk professionals through the recent code changes for the key connections of a deck.

The series features David Finkenbinder, P.E., a branch engineer for Simpson Strong-Tie who is passionate about deck codes and safety. He offers information on load resistance and the hardware that professionals can use at the crucial connections to make a deck code compliant. “This was a great opportunity to collaborate with the team at Fine Homebuilding, to communicate the connections on a typical residential deck and the role that they serve to develop a strong deck structure,” said David. “These same connections would also likely be common in similar details created by an Engineer, when designing a deck per the International Building Code (IBC).”

Screen Shot 2016-03-30 at 3.49.17 PM

The videos are being released every Wednesday during the month of March and feature the following deck connections:

  • Ledger Connection: This is the primary connection between a deck and a house. David tells the Fine Homebuilding team about various code- compliant options for attaching a deck ledger to a home.
  • Beam and Support Posts: David explains how connectors at this critical point can prevent uplift and resist lateral and downward forces. He also discusses footing sizes and post-installation anchor solutions.
  • Joists: This video reviews proper joist hanger installation and the benefits of installing hurricane ties between the joists and the beams. David goes into common joist hanger misinstallations, such as using the wrong fasteners or using a joist hanger at the end of a ledger.
  • Guardrail Posts: David reviews the different ways that you can attach a guardrail post so as to resist an outward horizontal load.
  • Stairs: David explains code-compliant options for attaching stringers to a deck frame.

Make sure to watch the series and let us know what you think. For more information, Fine Homebuilding has created an article titled “Critical Deck Connections.”

(Please note: this article is member-only/subscription content, so to read it you’ll need to either subscribe online or pick up the April/May issue of Fine Homebuilding.)

Screen Shot 2016-03-30 at 4.06.33 PM

Habitat for Humanity Introduces Habitat Strong Program

You’re probably already familiar with Habitat for Humanity, a nonprofit builder of simple, decent and affordable homes for low-income families around the world. According to builderonline.com, they were the 15th-largest builder in the country in 2015 when ranked by number of closings. Simpson Strong-Tie has been an official national partner with Habitat for Humanity since 2007, making contributions of cash and products exceeding $2.5 million in that time, and Simpson Strong-Tie employees have spent hundreds of hours building homes and training local Habitat affiliates.

Habitat for Humanity Home

We know from working on Habitat houses that they tend to be well built. There were newspaper articles about Habitat houses performing better than neighboring houses in Hurricane Andrew. In an effort to better benefit the homeowners they serve, Habitat has recently started a formal program to build even better, code-plus homes that could stand up to local hazards and document the methods used during construction. The name of this new program is Habitat Strong. Simpson Strong-Tie is proud to be a major sponsor of the program.

Habitat Strong actually began as a pilot project funded by Travelers Insurance that built 20 disaster-resistant homes in Alabama, Mississippi, New York and Connecticut. The success of that project convinced Habitat of the importance of building stronger, more resilient homes in all parts of the country. Starting from those regional hurricane-inspired efforts, the Habitat Strong program is now being used by more than 48 affiliates throughout the country, as shown on this map.

Habitat for Humanity Habitat Strong affiliate map.

According to Habitat for Humanity, “The Habitat Strong program is designed to promote the building of homes that are more durable, resilient, and physically stronger. The need for stronger homes has become increasingly apparent, and through Habitat Strong’s fortified codes-plus building practices, we are able to strengthen homes’ building envelopes, which enable[s] them to better withstand natural disasters in every region of the country. This program was developed specifically for the Habitat model to be affordable and volunteer-friendly, while offering benefits to partner families that will last for years to come. Based on these principles, we believe that building homes Habitat Strong is the right thing to do!”

Habitat for Humanity has established a set of construction standards for Habitat Strong that are based on the Insurance Institute for Business & Home Safety® (IBHS) FORTIFIED Home™ program. The FORTIFIED program is a scientifically developed, systems-based incremental approach for creating stronger, safer homes. There are three levels of FORTIFIED Home™ designations: Bronze, Silver and Gold. Each level builds upon measures at the preceding level to increase the disaster resistance of the home. You can take a look at the FORTIFIED Home standards on the IBHS website at www.disastersafety.org.

There are now three separate sets of FORTIFIED Home™ standards: Hurricane, High Wind & Hail, and High Wind. In general, the three levels consist of the following:

Bronze:

  • Strengthen roof deck fastening by using 8d ring-shank nails in a closer-than-normal nailing pattern.
  • Apply a secondary water barrier to the roof deck so there will still be protection from water damage even if the roof covering is blown off.
  • Install a roof covering that is rated for high winds and, if appropriate, hail forces.
  • Prune nearby trees to prevent damage to the home during a wind event.

Silver:

  • Complete all requirements for Bronze.
  • Brace gable ends over 4′ tall and ensure they are sheathed with a minimum thickness of wood structural panel.
  • Anchor wood frame chimneys to the roof structure.
  • Anchor attached structures, such as porches and carports, from the roof to the foundation.

Gold:

  • Complete all requirements for Silver.
  • Provide a continuous load path for wind forces from the roof to the foundation. In a normal 115-mph wind zone, the load path is to be designed for at least 140 mph.
  • Provide a garage door that is rated for high winds.

Habitat for Humanity is recommending to their affiliates that homes built in coastal areas be built to the IBHS Gold standard for hurricanes, and those built in inland areas be built at a minimum to the Bronze or Silver standards for high winds. The Habitat homes that meet the Bronze or Silver standards will be certified as Habitat Strong. Habitat homes that are built to the Gold standard will be certified as Habitat Strong+.

Simpson Strong-Tie is proud to be assisting Habitat for Humanity with Habitat Strong. In January, we hosted a training for Texas affiliates that was offered by Habitat and IBHS staff at our Houston training facility. We also donated connectors for a demonstration home at Michigan State University that we helped design.

If you would like more information on Habitat Strong, contact HabitatStrong@habitat.org. To learn how you can help Habitat for Humanity, visit www.habitat.org/getinv/volunteer.

Are you aware of any other programs for strengthening affordable housing? Let us know in the comments below.


Impact Community Resilience as a USRC Member and Certified Rater

The U.S. Resiliency Council (USRC) recently launched its Building Rating System for earthquake hazards. The Rating System assigns a score of from one to five stars for three building performance measures: Safety, Damage (repair cost) and Recovery (time to regain basic function).Continue Reading

Shrinkage Compensation Devices

Over the weekend, I had the pleasure of watching my daughter in her cheer competition. I was amazed at all the intricate detail they had to remember and practice. The entire team had to move in sync to create a routine filed with jumps, tumbles, flyers and kicks. This attention to detail reminded me of the new ratcheting take-up device (RTUD) that Simpson Strong-Tie has just developed to accommodate 5/8″ and ¾” diameter rods. The synchronized movement of the internal inserts allows the rod to move smoothly through the device as it ratchets. The new RTUDs are cost effective and allow unlimited movement to mitigate wood shrinkage in a multi-story wood- framed building. When designing such a building, the Designer needs to consider the effect of shrinkage and how to properly mitigate it.

Our SE blog post on Continuous Rod Restraint Systems for Multi-Story Wood Structures explained the importance of load path and  the effects of wood shrinkage. This week’s blog post will focus on the importance of mitigating the shrinkage that typically occurs in multi-story light-frame buildings.

Shrinkage is natural in a wood member. As moisture reaches its equilibrium in a built environment, the volume of a wood member decreases. The decrease in moisture causes a wood-framed building to shrink.

The IBC allows construction of light-framed buildings up to 5 and 6 stories in the United States and Canada respectively. Based on the type of floor framing system, the incremental shrinkage can be up to ¼” or more per floor. In a 5-story building, that can add up to 1-¼” or more and possibly double that when construction settlement is included.

rods1
Typical Example of gap forming between nut and plate when wood shrinkage at top level occurs without shrinkage device.

The Simpson Strong-Tie Wood Shrinkage Calculator is a perfect tool to determine the total shrinkage your building can experience.

Wood Shrinkage Calculator

In order to accommodate the shrinkage that occurs in a multi-story wood-framed building, Simpson Strong-Tie offers several shrinkage compensating devices. These devices have been tested per ICC-ES Acceptance Criteria 316 (AC316) and are listed under ICC-ES ESR-2320 (currently being updated for the new RTUD5, RTUD6, and ATUD9-3).

AC316 limits the rod elongation and device displacement to 0.2 inches between restraints in shearwalls. This deflection limit is to be used in calculating the total lateral drift of a light-framed wood shearwall.

rod3
3 Part Shearwall Drift Equation

The 0.2-inch allowable limit prescribed in AC316 is important to a shearwall’s structural ability to transfer the necessary lateral loads through the structure below to the foundation level. This limit assures that the structural integrity of the nails and sill plates used to transfer the lateral loads through the shearwalls is not compromised during a seismic or wind event. Testing has shown that sill plates can crack when excessive deformation is observed in a shearwalls. Nails have also been observed to pull out during testing.  Additional information on this can be found here.

rod4
Sill Plates Cracked due to excessive uplift at ends of shearwall.
rods5
Nails pull out due to excessive uplift at ends of shearwall.

In AC316, 3 types of devices are listed.

  • Compression-Controlled Shrinkage Compensating Device (CCSCD): This type of device is controlled by compression loading, where the rod passes uninterrupted through the device. Simpson Strong-Tie has several screw-type take-up devices, such as the Aluminum Take-Up Device (ATUD) and the Steel Take-Up Device (TUD), of this type.
rods6
ATUD (CCSCD)
  • Tension-Controlled Shrinkage Compensating Device (TCSCD): This type of device is controlled by tension loading, where the rod is attached or engaged by the device and allows the rod to ratchet through as the wood shrinks. The Simpson Strong-Tie Ratcheting Take-Up Device (RTUD) is of this type.

rod7
RTUD (TCSCD)
  • Tension-controlled Shrinkage Compensating Coupling Device (TCSCCD): This type of device is controlled by tension loading that connects rods or anchors together. The Simpson Strong-Tie Coupling Take-Up Device (CTUD) is of this type.
CTUD (TCSCCD)
CTUD (TCSCCD)

Each device type has unique features that are important in achieving the best performance for different conditions and loads. The following table is a summary of each device.

rods9
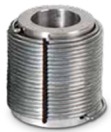
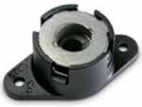
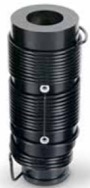
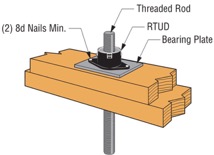
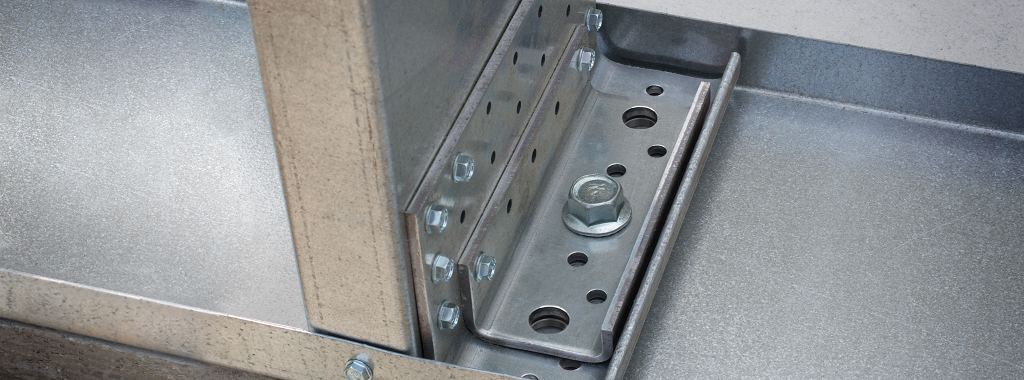
The most cost-effective Simpson Strong-Tie shrinkage compensation device is the RTUD. This device has the smallest number of components and allows the rod unlimited travel through the device. It is ideal at the top level of a rod system run or where small rod diameters are used. Simpson Strong-Tie RTUDs can now accommodate 5/8″ (RTUD5) and ¾” (RTUD6) diameter rods.

How do you choose the best device for your projects? A Designer will have to consider the following during their design.

rod10
RTUD Assembly

Rod Tension (Overturning) Check:

  • Rods at each level designed to meet the cumulative overturning tension force per level
  • Standard and high-strength steel rods designed not to exceed tensile capacity as defined in AISC specification
    • Standard threaded rod based on 36 / 58 ksi (Fy/Fu)
    • High-strength Strong-Rod based on 92 / 120 ksi (Fy/Fu
    • H150 Strong-Rod based on 130 / 150 ksi (Fy/Fu)
  • Rod elongation (see below)

 Bearing Plate Check

  • Bearing plates designed to transfer incremental overturning force per level into the rod
  • Bearing stress on wood member limited in accordance with the NDS to provide proper bearing capacity and limit wood crushing
  • Bearing plate thickness has been sized to limit plate bending in order to provide full bearing on wood member

 Shrinkage Take-Up Device Check

  • Shrinkage take-up device is selected to accommodate estimated wood shrinkage to eliminate gaps in the system load path
  • Load capacity of the take-up device compared with incremental overturning force to ensure that load is transferred into rod
  • Shrinkage compensation device deflection is included in system displacement

 Movement/Deflection Check

  • System deformation is an integral design component impacting the selection of rods, bearing plates and shrinkage take-up devices
  • Rod elongation plus take-up device displacement is limited to a maximum of 0.2″ per level or as further limited by the requirements of the engineer or jurisdiction
  • Total system deformation reported for use in Δa term (total vertical elongation of wall anchorage system per NDS equation) when calculating shearwall deflection
  • Both seating increment (ΔR) and deflection at allowable load (ΔA) are included in the overall system movement. These are listed in the evaluation report ICC-ES ESR-2320 for take-up devices

 Optional Compression Post Design

  • Compression post design can be performed upon request along with the Strong-Rod System
  • Compression post design limited to buckling or bearing perpendicular to grain on wood plate
  • Anchorage design tools are available
  • Anchorage design information conforms to AC 318 anchorage provisions and Simpson Strong-Tie testing

In order to properly design a continuous rod tie-down system for your shearwall overturning restraint, all of the factors listed above will need to be taken into consideration.

A Designer can also contact Simpson Strong-Tie by going to www.strongtie.com/srs and filling out the online “Contact Us” page to have Simpson Strong-Tie design the continuous rod tie-down system for you. This design service does not cost you a dime. A few items will be required from the Designer in order for Simpson Strong-Tie to create a cost-effective rod run (it is recommended that on the Designer specify these in the construction documents):

  • There is a maximum system displacement of 0.2″ per level, which includes rod elongation and shrinkage compensation device deflection. Some jurisdictions may impose a smaller deflection limit.
  • Bearing plates and shrinkage compensation devices are required at every level.
  • Cumulative and incremental forces must be listed at each level in Allowable Stress Design (ASD) force levels.
  • Construction documents must include drawings and calculations proving that design requirements have been met. These drawings and calculations should be submitted to the Designer for review and the Authority Having Jurisdiction for approval.

More information can be obtained from our website at www.strongtie.com/srs, where a new design guide for the U.S., F-L-SRS15, and a new catalog for Canada, C-L-SRSCAN16, are available for download.

rod11
US Design Guide F-L-SRS15 and Canadian Catalog C-L-SRSCAN16

Specifying Self-Drilling Screws: “Standard” vs. “Engineered”

In my past life as a Design Engineer, when specifying a screw the size of the screw was the key feature that I considered. In my mind, a #10 screw performed better than #8, and a #12 was better than #10 and all #10 screws were the same. But that is not always true. Just as a shoe size or a dress size may not be exactly the same for all brands, a screw of the same size from different manufacturers may perform differently. The head type, head design, thread design (fine, coarse, thread angle, pitch), thread type (like box threads, buttress threads, unified, square) and drill point type (like #1, #3, #5 drill point) can influence the performance of a screw. When innovatively designed, a #10 engineered screw can meet or exceed the performance of a #12 or #14 screw in loads and drill time and could result in cost savings. You can use fewer screws, which would mean labor savings. For example, our newly designed XU34B1016 screw, which is a #10 screw with 16 threads per inch, a hex washer head and a #1 drill point, that performs better than a #14 standard screw in lighter gauge steels.

screws1

What Are Self-Drilling Tapping Screws?

Self-drilling tapping screws, or self-drilling screws, as the name implies, drill their own hole, eliminating the need for predrilling, and form or cut internal mating threads.  They are  relatively fast to  instal compared to bolts or welds. Unlike pins, they do not require a thick support material to be used. They can be used in very thin steel, such as 26 gauge, up to steel that is ½” thick. Self-drilling screws may be a perfect choice for most applications involving cold-formed steel (CFS). They are most commonly used for CFS connections: either attaching CFS to CFS, wood to CFS or CFS to wood. They are a logical choice when the other side of the connection or material is not accessible.

Most self-drilling screws are made of steel wire that meets the specification of ASTM A510 minimum grade 1018 material as specified in ASTM C1513 standard. Self-drilling screws are heat treated  to case harden then so that they meet the hardness, ductility, torsional strength and drill drive requirements as specified in ASTM C1513 standard.  ASTM C1513 refers to SAE J78 for the dimensional and performance requirements of self-drilling screws.

Screw Selection

While selecting the screw, you need to figure out the head type that works for the application. For example, a flat-head screw would be a good choice for wood-to-steel applications, but for steel-to-steel applications, a hex head or a pan head may be a better choice. Similarly, the length of the screw should be sufficient to fasten  the members of the connection together. According to Section D1.3 of AISI S200, the screw should be at least equal in length to the total thickness of the material including gaps with a minimum of three exposed threads. The length of the drill point is another important feature to consider. It should be long enough to drill through the entire thickness of the material before engaging the threads. This is because thread forming occurs with fewer revolutions than  the drilling process.   if the drill point length is not long enough, the screw threads can engage the connection material and the screw can bind and break.

screws2

Some drill points also have “wings” to  drill a hole in the material that is larger in diameter than the threaded shank. Screws with this kind of point are mainly used for wood-to-steel applications. The blog post by Jeff Ellis titled “Wings or No Wings” provides some useful insights for screws with wings when used in shearwall applications.

The Test Standards and Evaluation Criteria for Standard and Engineered Screws

Per Section D1 of AISI S200, screws used for steel-to-steel connections or sheathing-to-steel connections shall be in compliance with ASTM C1513 or an approved design or design standard.

For ASTM C1513–compliant screws (per AISI S100), Section E4 provides equations to calculate shear, pullout and pullover of screws used in steel-to-steel connections. It also provides safety and resistance factors for calculating allowable strength or design strength. These equations are based on the results of tests done worldwide and the many different types of screws used in the tests. As a result, these equations seem to have a great degree of conservatism.

As discussed earlier, many factors, such as the head type and washer diameter, thread profile, drill point type and length, installation torque and the installation method affect or influence the performance of a screw. In order to qualify the screws as ASTM C1513–compliant or better performing, manufacturers need to have their screws evaluated per Acceptance criteria for Tapping Screw Fasteners AC118 developed by International Code Council – Evaluation Service. The criteria have different requirements depending on whether the intention is to qualify as standard screws or proprietary screws.  For proprietary screws, connection shear, pullout and pullover tests are performed in accordance with the AISI S905 test method. The shear strength and tensile strength of the screw itself are evaluated per test standard AISI S904. The safety and resistance factors are calculated in accordance with Section F of AISI S100. The pictures below are some test set-ups per AISI S905 and AISI S904 test procedures.

screws3 screws4 screws5

Another important consideration is corrosion resistance. AC118 has a requirement for testing the fasteners for corrosion resistance in accordance with ASTM B117 for a minimum of 12 hours. The screws tested shall not show any white rust after 3 hours or any red rust after 12 hours of the test. At the same time, it is important to keep in mind  that  hardened screws are prone to hydrogen embrittlement and are not recommended for exterior or wet condition applications. Also, these screws are  not recommended for use with dissimilar metals.  If self-drilling screws are to be used in exterior environments, the screws need to be selectively heat treated to keep the core and surface hardness in a range that  reduces the susceptibility to hydrogen embrittlement. Other fastener options for exterior environments are stainless-steel screws.

This table shows are some of our screw offerings for CFS applications. Our stainless-screw options can be found in  Fastening Systems Catalog (C-F-14) or at www.strongtie.com.

screw6a

What are the screws that you most commonly specify? Share your screw preferences and your ideas on self-drilling screws in your comments below.

Don’t Buckle at the Knees: RCKW Testing

A previous blog post described how Simpson Strong-Tie tests and loadrates connectors used with cold-formed steel structural members per acceptance criteria ICC-ES AC261.

This week, I would like to describe how we test and determine engineering design values for RCKW, Rigid Connector Kneewall, in a CFS wall assembly and how the data can help designers perform engineering calculations accurately and efficiently.Continue Reading